You can extend your home’s service life by treating the roof, gutters, and exterior as one water-control system. You’ll inspect shingles, flashing, and vent boots for damage, then clear gutters so runoff can’t back up under the roof edge. You’ll verify hangers are corrosion-resistant and fastened to solid framing, and you’ll discharge downspouts 4–6 feet from the foundation to meet drainage best practice. Miss one link, and the failure usually shows up where you can’t see it…
Roof Maintenance Checklist for Every Season
Because weather stresses roofing systems in different ways throughout the year, you should follow a seasonal maintenance checklist to catch defects early and keep the assembly performing as designed.
In spring, inspect flashings, sealants, and fasteners, and clear roof drains and scuppers so ponding can’t load the deck.
In summer, verify Roof insulation remains dry and continuous at penetrations, and confirm Ventilation systems meet manufacturer and code-required net free area.
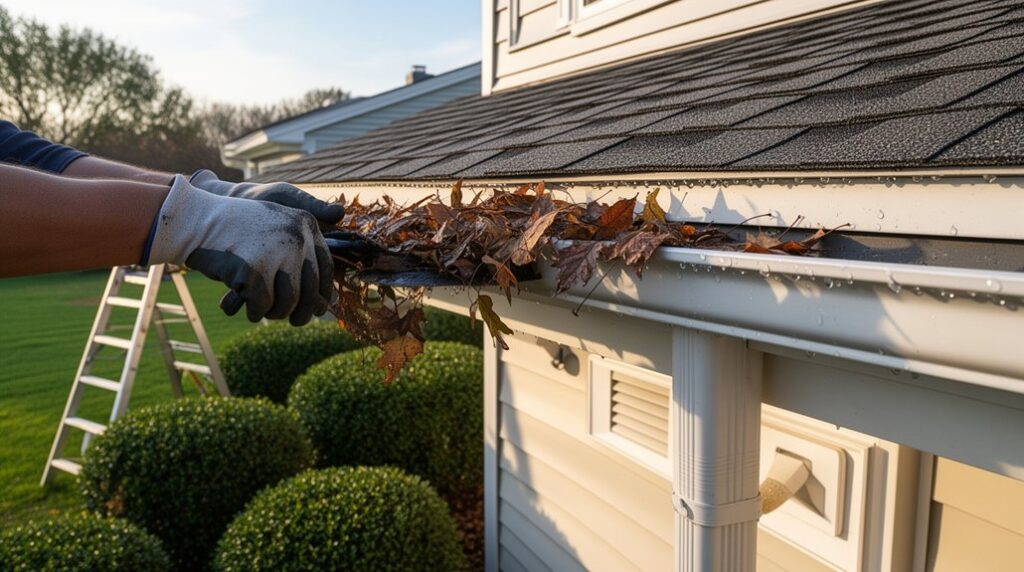
In fall, remove debris at valleys and terminations, check gutters and downspouts for secure attachment, and confirm attic access hatches are weatherstripped.
In winter, manage ice dams by maintaining air sealing at the ceiling plane and keeping intake and exhaust paths unobstructed.
Use fall protection, ladder tie-offs, and lockout/tagout for powered fans.
Document findings and corrective actions.
Spot Roof Damage Before It Becomes a Leak
You can prevent active leaks by spotting early roof damage such as missing or cracked shingles, exposed fasteners, lifted flashing, granule loss, and interior staining.
You’ll inspect safely by staying off steep or wet surfaces, using binoculars from grade when possible, and following OSHA ladder rules with proper footing and three-point contact.
If you see compromised flashing, soft decking, or widespread damage, you’ll stop and route repairs to a qualified contractor to keep the roof system code-compliant.
Common Warning Signs
Before the next storm tests your roof assembly, learn to spot early warning signs that indicate compromised weatherproofing and potential water intrusion. Look for missing, cracked, or curled shingles, exposed nail heads, and granule loss that leaves bald patches. Check flashing at chimneys, skylights, and wall junctions for gaps, corrosion, or failed sealant, since codes rely on continuous, properly lapped flashing to shed water.
Note soft decking, sagging ridgelines, or uneven planes that suggest structural moisture damage. Inside, track ceiling stains, damp insulation, or musty odor near penetrations and valleys.
On the exterior, Algae growth and dark streaks can retain moisture and accelerate wear. Also watch for Pest infestation signs—gnawed fascia, nesting debris, or droppings—because openings compromise ventilation and water barriers.
Safe Inspection Methods
After heavy weather rolls through, a safe roof check starts from the ground and follows OSHA-style fall‑prevention principles—assume any edge, slope, or wet surface can turn into a fall hazard.
Use binoculars to scan shingles, flashing, ridge caps, and vent boots; note lifted tabs, punctures, granule loss, and exposed fasteners. Photograph conditions for documentation, then decide if access is justified.
If you must climb, prioritize ladder safety: set a 4:1 angle, extend 3 feet above the eave, secure the top, and keep three points of contact.
Wear protective gear—cut-resistant gloves, eye protection, non-slip footwear, and a properly rated harness with an anchor when code or slope requires it.
Don’t step on brittle valleys; test decking before loading.
Gutter Maintenance Tips to Prevent Clogs
Although gutters look simple, they’re a critical drainage component, and clogs can drive roof runoff behind fascia, overflow at the foundation, and accelerate rot and mold. You’ll prevent blockages by keeping roof edges trimmed, controlling leaf drop, and verifying hangers and fasteners stay tight and corrosion-free.
Maintain proper slope (about 1/16 inch per foot) toward downspouts, and confirm joints remain sealed to limit debris snag points. Schedule seasonal checks after storms and before freezing weather, and keep downspout discharge paths unobstructed and directed away from footings per local requirements.
For Rainwater harvesting, use screened inlets and first-flush diverters so stored water stays clean. Consider gutter guard installation that matches your roof pitch and debris load, and don’t block required overflow provisions.
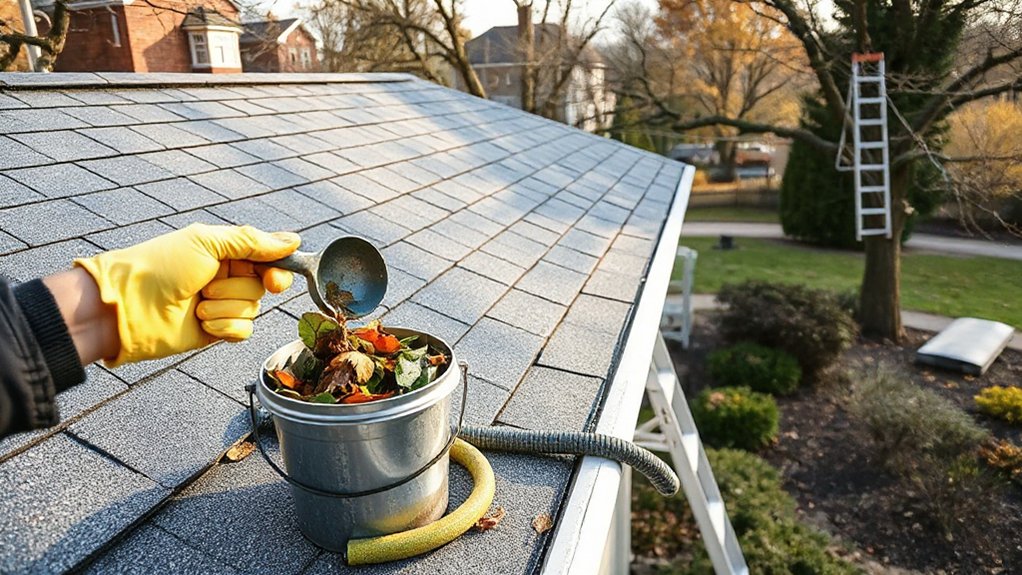
Clean Gutters and Downspouts the Right Way
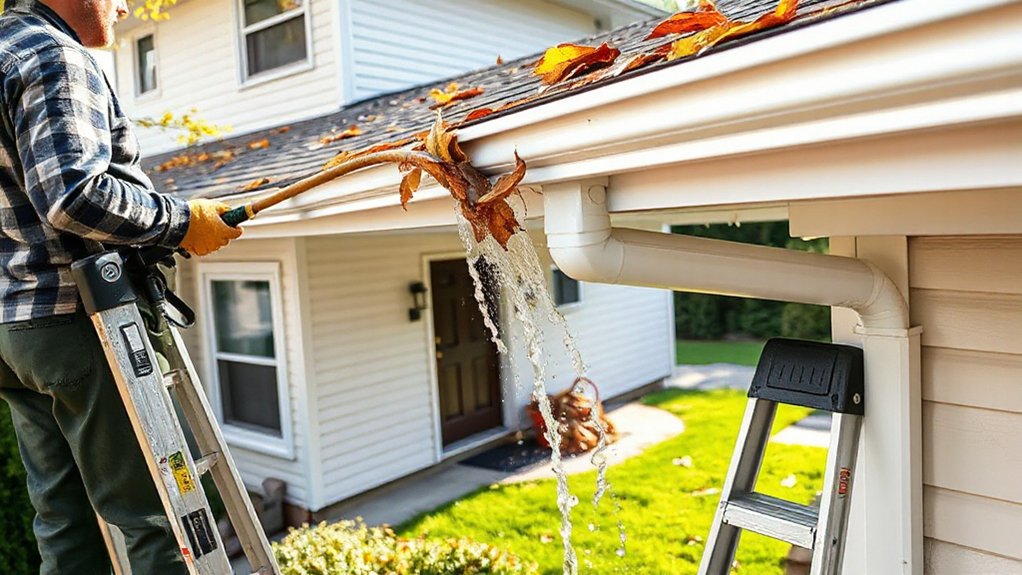
When you clean gutters and downspouts methodically, you protect the roof edge, siding, and foundation from overflow and hidden rot. Set a stable extension ladder on firm grade, maintain three-point contact, and use gloves and eye protection.
Start debris removal by scooping into a bucket, not onto shingles or landscaping. Flush the gutter with a hose, watching for steady flow to each outlet. If water backs up, clear the downspout from the bottom with a plumber’s snake, then rinse until discharge runs clean away from the foundation.
Verify extensions or splash blocks direct water per local code. After drying, inspect seams and end caps; perform Gutter sealing with compatible exterior sealant where pinholes or gaps appear.
Document dates and conditions for maintenance records.
Fix Sagging Gutters and Loose Hangers
Since sagging gutters usually signal failed hangers or improper pitch, you should correct the support system before overflow damages fascia, soffits, or the foundation. Set up an extension ladder on firm ground, maintain three points of contact, and wear eye protection and cut-resistant gloves. Verify slope with a level: aim for about 1/4 inch drop per 10 feet toward the downspout. Mark the line, then re-seat the gutter.
For loose brackets, perform Hanger replacement with corrosion-resistant hidden hangers fastened into rafter tails or solid blocking, not just sheathing. Space hangers per manufacturer specs and local code, typically 24–36 inches, closer in snow zones. Add Gutter reinforcement at corners and end caps, and replace stripped fasteners with longer stainless or structural screws. Test flow with water.
Exterior Maintenance Tips for Siding and Trim
Once your gutters hang correctly and carry water away from the foundation, inspect siding and trim for moisture exposure, fastener failure, and sealant breakdown. Probe for soft spots at joints and penetrations, and verify required clearances above grade and roofing to meet manufacturer specs and local code.
Confirm Exterior siding laps correctly over flashing at windows, doors, and deck ledgers, and that all weep paths stay open.
Re-secure loose panels with corrosion-resistant fasteners, set flush without crushing, and replace missing kickout and step flashing where water can drive behind cladding.
Renew cracked caulk at trim-to-siding junctions using paintable, exterior-rated sealant, and maintain movement joints.
When you schedule trim painting, follow ladder and fall-protection requirements and keep work areas clear of overhead lines.
Prevent Peeling Paint and Wood Rot Outside
Although paint failure often looks cosmetic, it usually signals trapped moisture that can accelerate wood rot and create hidden structural damage. You’ll stop it by fixing the coating system, not just repainting.
Scrape to sound wood, then sand edges to a feather; wear eye protection and a respirator per manufacturer SDS. Replace any punky sections and fasten new wood with corrosion-resistant nails.
Prime bare wood the same day with an exterior, stain-blocking primer for paint protection, and seal end grain with a brush-on preservative for wood preservation.
Maintain required clearances: keep wood siding at least 6 inches above grade and 2 inches above hard surfaces.
Caulk only properly backed joints; don’t caulk weep paths.
Apply two topcoats at specified mil thickness.
Keep Water Away With Grading and Drainage
Good paint and sound siding won’t last if bulk water keeps pooling at the foundation, so manage it at the ground first. Set grade to slope away from the house at least 6 inches over the first 10 feet, and keep soil below siding and weep screeds to maintain clearance. Use compacted fill in lifts so it won’t settle and reverse slope later.
Add drainage solutions where runoff concentrates: extend downspouts to discharge 4–6 feet from the wall, direct splash blocks to daylight, or use tightline pipe to a legal outfall. Install a swale to intercept uphill flow, and keep it stabilized with turf or rock.
Before trenching, call utility locate, shore deep cuts, and follow local stormwater rules.
Know When to Call a Roofing Pro

When you’re unsure whether a roof issue is cosmetic or structural, it’s safer—and often required—to bring in a licensed roofing pro before you climb, pry, or patch. You’ll reduce fall risk, protect warranties, and stay aligned with local building and electrical codes.
Call a pro if you see active leaks, widespread shingle loss, soft decking, sagging ridgelines, damaged flashing, or moldy attic sheathing.
After hail, high winds, or a tree strike, schedule roof inspections to document impacts and verify underlayment, ventilation, and fastener patterns.
You should also hire help when you need gutter repairs tied to roof edge systems—like fascia rot, loose drip edge, or improper downspout discharge.
If your roof is steep, high, or multi-story, don’t DIY.
Frequently Asked Questions
How Often Should I Replace My Roof Entirely?
You’ll typically replace your roof entirely every 20–30 years, depending on Roof lifespan and Material durability. You should schedule inspections annually and after storms, and replace sooner if code-required, leaks, rot, or structural compromise appear.
Will My Homeowners Insurance Cover Gutter or Roof Repairs?
Your homeowners policy may cover repairs if a covered peril causes sudden damage; insurance coverage excludes wear, neglect, and improper installation. You’ll document loss, mitigate hazards, and file repair claims promptly, meeting local code and safety requirements.
What Gutter Size Is Best for Heavy Rain in My Area?
In summary, you’ll want 6-inch K-style gutters with 3×4 downspouts for heavy rain, maximizing Rainwater capacity. Choose durable Gutter material (aluminum/steel), secure hangers, and verify sizing/spacing meets local code and overflow safety.
Can I Install Gutter Guards, and Are They Worth the Cost?
You can install gutter guards, and they’re often worth it if debris causes clogs. Gutter guard benefits include improved flow and reduced ladder work. Do a Cost comparison, choose UL-listed products, and follow local code.
How Do I Choose a Reliable Exterior Maintenance Contractor?
Even if you think it costs more, you’ll avoid failures by vetting thoroughly: verify Contractor credentials (license, insurance, OSHA training), check code-compliant permits, demand written scopes, and confirm Maintenance scheduling, warranties, and safety plans via references.
Conclusion
Stay ahead of water damage by inspecting, cleaning, and securing your roof, gutters, and exterior on a set schedule. You’ll spot lifted shingles, failed flashing, and clogged downspouts before leaks reach the sheathing or foundation. You’ll clear debris, tighten corrosion-resistant hangers, and discharge downspouts 4–6 feet from the wall to meet drainage best practices. You’ll maintain siding clearance, repair peeling paint, and correct grading. When conditions are unsafe, call a licensed pro.