A garage can feel like dead space, yet it can become your safest, most comfortable extra room. You start by checking structure, damp, and headroom, then confirm what planning permission and Building Regulations require. You’ll plan insulation, airtight doors and windows, and compliant electrics with proper circuits and RCD protection. You’ll also size heating and ventilation to prevent condensation and mold. Next, you’ve got one decision that can make or break the whole conversion…
Garage Conversion Suitability Checklist (Structure, Damp, Headroom)
Before you draw up plans, you should confirm the garage is actually suitable for conversion by checking three fundamentals: structure, damp, and headroom. Inspect foundations, slab cracks, and wall movement; confirm the roof structure is sound, adequately braced, and capable of supporting any upgraded loads. Verify the opening can be properly lintelled if you infill the door.
Next, check damp: look for tide marks, salt deposits, mould, and cold-bridge condensation. Confirm you can install a compliant damp-proof course, floor membrane, perimeter drainage, and ventilation without trapping moisture.
Finally, measure headroom after proposed insulation and finishes; ensure safe stair/door clearances and code-required minimum ceiling heights. These checks protect Garage aesthetics and garden integration by preventing later remedial works.
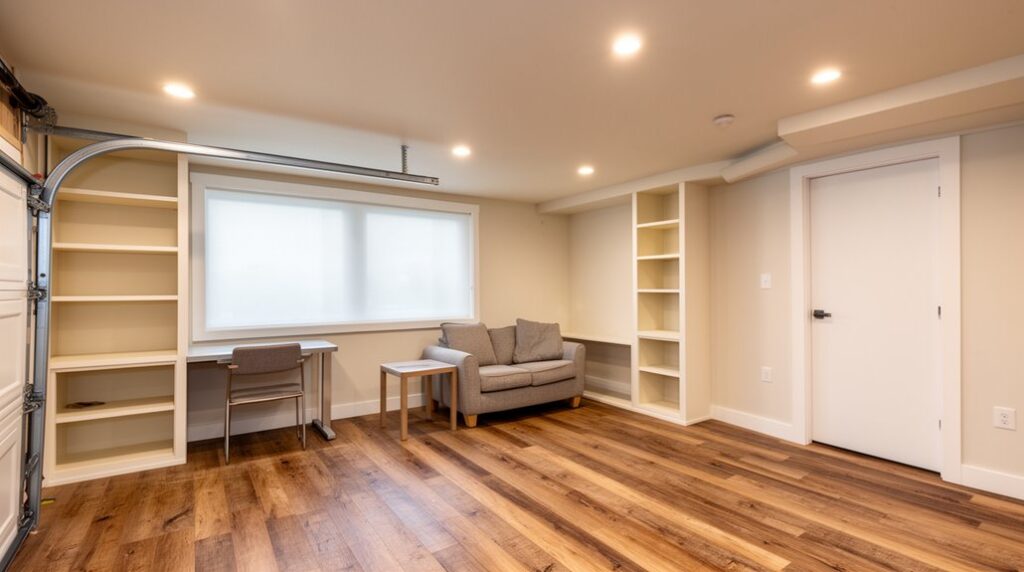
Pick the Right Garage Conversion Use (Office, Annexe, Gym)
You should choose the garage’s new use—office, annexe, or gym—based on how you’ll actually live in it day to day. Then confirm the layout supports compliant access, ventilation, insulation, electrics, and safe egress.
You’ll get better performance and fewer change orders if you size storage, sound control, heating, and power loads to the intended activity from the start.
You should also plan for future flexibility by routing services where they can be extended, using non-loadbearing partitions where possible, and keeping clearances so the room can switch use without compromising safety.
Match Space To Lifestyle
Although every garage starts as a blank box, the safest, most code-compliant conversion begins by matching the room’s purpose to how you actually live.
If you work from home, plan an office with dedicated circuits, hardwired data, and task lighting; keep egress clear and specify smoke/CO alarms where required.
If you need multigenerational space, an annexe demands proper insulation, fire separation, ventilation, and compliant plumbing with backflow protection and GFCI/RCD outlets.
If fitness is your priority, design a gym around floor loading, moisture control, and mechanical ventilation, plus impact-resistant finishes.
Whatever you choose, align Garage aesthetics with durable, easy-clean surfaces and choose Sustainable materials that meet fire ratings and low-VOC requirements.
Then finalize layouts around safe access and storage.
Plan For Future Flexibility
When needs change, a well-planned garage conversion should adapt without triggering major rework or new compliance issues. Pick a primary use—office, annexe, or gym—then design it to switch functions quickly.
Run ample dedicated circuits, add AFCI/GFCI where required, and rough-in data, plumbing, or a capped drain line so upgrades stay permitted. Frame non-load-bearing partitions or use demountable walls, and keep egress paths clear with code-rated doors and smoke/CO alarms.
Specify durable, low-VOC, eco-friendly materials and maintain required insulation, vapor control, and fire separation to the dwelling. Choose built-ins that double up: a Murphy bed, fold-down desk, lockable storage.
Finish with creative decor that’s easy to refresh and clean.
Planning Permission vs Building Regs for Garage Conversions
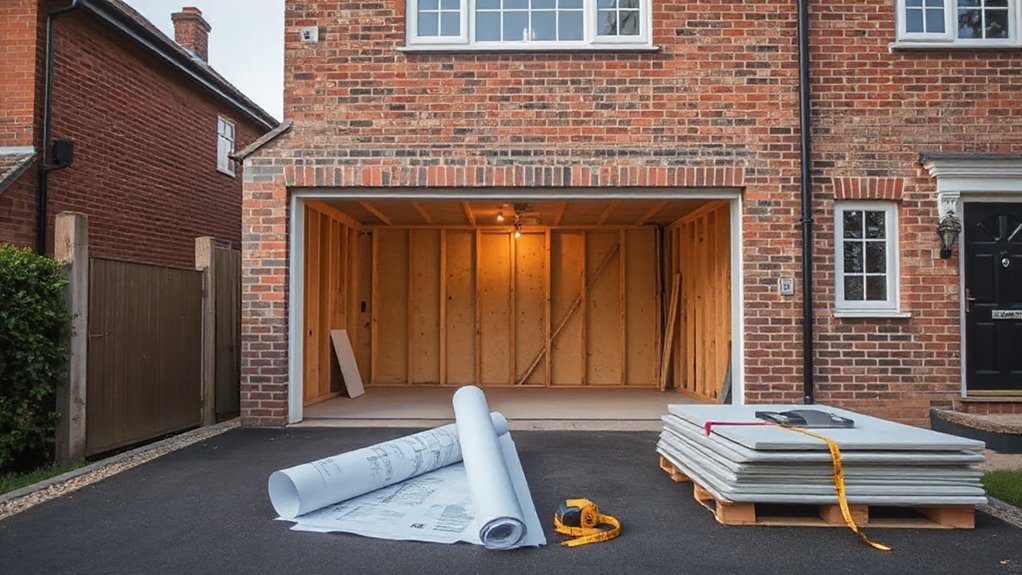
Before you start work, you’ll need to confirm whether your garage conversion requires planning permission, especially if you’re changing the building’s external appearance or its use.
Even if planning isn’t needed, you must still comply with Building Regulations covering structure, insulation, ventilation, fire safety, electrics, and drainage.
You should check with your local authority early and document approvals so the finished room is safe, certifiable, and insurable.
Planning Permission Requirements
How do you know whether your garage conversion needs planning permission, building regulations approval, or both? Start by checking if the work stays within permitted development: you’re converting an existing garage, you’re not enlarging it, and you’re not altering the roofline or principal elevation in a way that changes the street scene.
You’ll likely need planning permission if you’re in a conservation area, your home is listed, an Article 4 Direction applies, or your title/estate planning conditions remove permitted development rights.
You may also trigger permission if you replace the garage door with a new façade that affects garage aesthetics, sightlines, parking provision, or landscaping integration.
Confirm constraints via the local planning portal, then get written confirmation before you start.
Building Regulations Compliance
Even if your garage conversion falls under permitted development, you’ll still need Building Regulations approval because you’re changing a non-habitable space into a room that must meet minimum safety and performance standards.
You must show compliance for structure (floor loadings, lintels, wall stability), insulation and damp proofing, ventilation, fire separation/means of escape, electrics to Part P, and safe plumbing and drainage if you add a bathroom.
You’ll also need compliant windows, glazing safety, and thermal performance to meet energy targets.
Use either a Full Plans submission or Building Notice, then book inspections for foundations (if altered), insulation, and final sign-off.
Don’t confuse this with planning: planning focuses on exterior aesthetics and historical considerations, while Building Regs protect occupants.
Keep completion certificates for resale and insurance.
Garage Conversion Budget: Typical Costs + Cost Drivers
Because a garage starts life as an unconditioned, utility-grade space, your conversion budget typically lands in the mid–five figures once you bring the room up to residential code—plan roughly $15,000–$50,000+.
Costs are driven by the scope of insulation and air-sealing, HVAC, electrical capacity and lighting, plumbing additions, drywall and fire-rated assemblies, floor build-up/moisture control, windows and exterior doors, and permit/inspection fees****.
Add design and engineering if you alter openings or load paths. Expect higher bids if you need a service-panel upgrade, AFCI/GFCI protection, hardwired smoke/CO alarms, or new circuits for HVAC.
Plumbing rough-ins and venting can quickly shift the total. Fire separation at the house interface and tempered glazing where required add labor.
For Garage organization, budget built-ins early; for exterior aesthetics, match cladding and trim to satisfy planning.
Garage Conversion Floor: Damp Proofing, Levels, Drainage

Before you frame walls or lay finish flooring, treat the garage slab like a moisture and level-control project: verify slopes to any existing drain, check for low spots and cracks, and confirm the slab sits high enough to keep water from migrating in at the door and wall lines.
Perform a moisture test (ASTM F1869 or in-situ RH) and install a code-accepted vapor retarder or epoxy DPM if readings exceed flooring limits.
Patch cracks with compatible repair mortar, then use a self-leveling underlayment where flatness fails manufacturer tolerances.
If you must raise the floor, use sleepers or a floating system that preserves door clearances and doesn’t block drainage paths. Maintain any required drain or provide an approved alternative.
Choose finishes that support Garage aesthetics and your Color schemes.
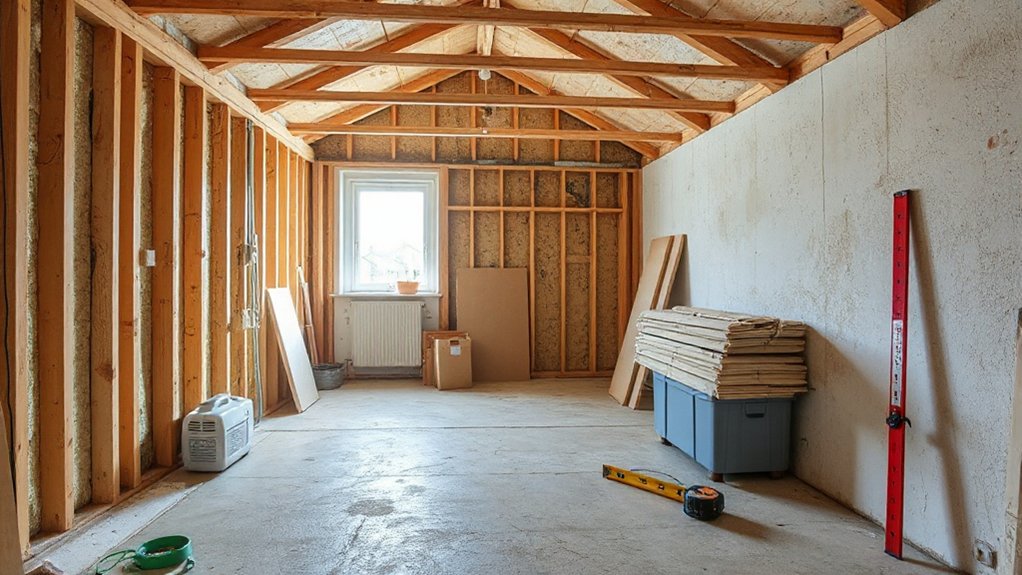
Garage Conversion Insulation: Walls, Roof, Thermal Bridging
Once you’ve confirmed the slab is dry and flat, treat insulation as a continuous thermal and air-control layer that must meet your local energy code and fire-safety requirements.
For walls, build a stud lining with a capillary break from masonry, then fit Garage insulation (mineral wool or PIR) tight to avoid gaps, and tape all board joints as your air barrier. Add an approved vapour control layer on the warm side where required, and maintain the required fire rating with plasterboard.
At the roof, insulate between and/or under rafters, keep required ventilation paths for cold roofs, and install rafter baffles where needed. Reduce thermal bridging by using continuous insulation over studs/rafters, insulating rim/band areas, and sealing junctions at corners and eaves.
Garage Conversion Windows and External Doors (Light + Security)
With the insulation and air-sealing layer continuous, turn to windows and external doors, since every new opening can undo your U-values, airtightness, and fire strategy if it’s poorly specified or fitted. Choose units with compliant U-values, safety glazing to critical locations, and tested fire performance where separation demands it.
Set openings to maintain cavity closers, DPC continuity, and insulated reveals, then tape and seal to the airtight line. Specify trickle vents only if your ventilation design requires them, and keep weep holes clear.
Use secure-by-design locks, hinge bolts, laminated glass, and internal beading to resist attack; don’t overlook frame fixings into sound structure. Match proportions and finishes to Garage aesthetics, and position glazing to protect privacy while complementing exterior landscaping and drainage falls.
Garage Conversion Electrics, Lighting, and Broadband/Wi‑Fi
Before you close up walls, you’ll calculate the electrical load for the new room, confirm spare capacity at the consumer unit, and plan any new circuits with compliant cable routes and protection.
You’ll then lay out lighting to suit tasks and ambience, specifying fitting types, switch positions, and control options (dimming, two‑way, sensors) while maintaining safe zones and clear access for maintenance.
Finally, you’ll plan broadband and Wi‑Fi coverage with a hardwired data point where possible, sensible router/AP placement, and tested signal strength so the room stays reliably connected.
Electrical Load Planning
How much power will your new room actually need? List every fixed and plug-in load: heaters, A/C, desk equipment, fridge, laundry, EV charging, and network gear. Use nameplate watts/amps, apply diversity only where allowed, and total the expected demand.
If the existing garage circuit is shared, don’t assume spare capacity.
Prioritize Electrical safety and circuit planning: run a dedicated subcircuit set from the consumer unit, size conductors for calculated load, voltage drop, and installation method, and protect with the correct MCB/RCBO and RCD where required.
Provide enough socket circuits to avoid daisy-chained extension leads. Maintain accessible isolation, label new breakers, and confirm main service capacity and earthing/bonding before energizing.
Test and certify to local code.
Lighting Design And Control
Where will light actually fall once the garage becomes a room rather than a storage bay? Map tasks first: seating, desk, storage, and any entry route.
Use layered lighting—ceiling ambient plus Accent lighting to highlight shelving or artwork—so you don’t rely on one harsh fixture. Choose sealed or suitably rated luminaires if moisture or dust remains, and keep clearances from insulation and combustible materials.
Put switches at standard heights by the primary door, and add 2‑way switching if you’ll enter from the house and outside. Fit dimmer switches only with compatible LED drivers and lamps, and don’t exceed the dimmer’s wattage rating.
Maintain circuit protection, safe zoning near sinks, and proper earthing throughout.
Broadband And Wi‑Fi Setup
Good lighting makes the new room usable at any hour, but you’ll also want stable broadband and Wi‑Fi so the space works for streaming, calls, and smart controls.
Run data cabling before you close walls: install Cat6 in conduit where possible, keep it separated from mains wiring, and terminate to a small patch panel in an accessible, ventilated location. Use listed wall plates and maintain bend radius to protect performance.
Place your router or access point centrally, not behind foil-backed insulation or metal garage doors. If coverage drops, add Wi Fi extenders or a mesh node, powered from a dedicated, RCD/RCBO-protected circuit.
Label outlets, avoid daisy-chained power strips, and keep equipment clear of damp zones. Plan capacity for Smart devices and future upgrades too.
Garage Conversion Heating and Ventilation (Condensation Control)
Although a garage may look dry and stable, once you insulate and air-seal it for living space, moisture can get trapped and quickly turn into condensation on cold surfaces.
Control it by installing continuous, code-rated ventilation systems sized to the room and ducted outdoors, not into the attic or wall cavities.
Seal penetrations, add an interior vapor retarder where your climate zone requires it, and insulate rim joists to stop cold-spot sweating.
Provide heat with an approved, permanently installed source; avoid unvented combustion appliances and keep required clearances.
Include a dedicated bath or laundry exhaust if added.
Maintain slight positive pressure and verify airflow at registers.
Good Garage organization helps keep vents clear and reduces moisture from stored items.
Storage, Soundproofing Options, and Final Finishes
Once you’ve locked in safe heat and verified dry, ducted ventilation, you can finish the conversion with storage that won’t block airflow, sound control that doesn’t compromise fire or moisture details, and durable finishes that meet code.
Keep shelving off exterior walls so you don’t crush insulation or trap condensation; anchor tall units to studs, maintain required clearances to panels, and don’t cover access hatches.
For soundproofing, pack mineral wool in cavities, then add sealed drywall layers; use acoustical caulk at perimeters and avoid foam that violates fire ratings.
If you float a floor, use approved underlayment and leave expansion gaps.
Choose Decorative finishes with washable, low-VOC paint, slip-resistant flooring, and trim that won’t wick moisture.
Use light-reflective color schemes to reduce artificial lighting needs.
Frequently Asked Questions
How Long Does a Typical Garage Conversion Take From Start to Finish?
You’ll typically finish a garage conversion in 4–8 weeks, depending on permits and inspections. You’ll speed timelines by planning Garage insulation early and confirming Plumbing requirements, keeping wiring, fire separation, and egress code-compliant and safe.
Will Converting My Garage Reduce My Home’s Resale Value?
It can, but you won’t tank value if you build it right—sorry, resale prophets. You’ll manage Conversion costs, add compliant Garage insulation, keep parking/storage solutions, pull permits, meet egress, fire, and electrical codes.
Can I Convert a Garage if It’s Used for Parking Under Mortgage Terms?
You can, but you must review your mortgage covenants and HOA rules, and get legal permission. You’ll also need permits, proper egress, fire separation, ventilation, and garage insulation to meet code.
Do I Need Party Wall Agreements for a Garage Conversion Near Neighbours?
You’ll need a Party wall notice if you cut into, raise, or build on the boundary, or excavate nearby. You can’t rely on a Neighbor agreement alone—use a formal award, surveyor, and safe sequencing.
Will My Home Insurance Cover the Conversion Work and the New Room?
Your home insurance won’t automatically cover it—because insurers love surprises. You must notify them, confirm insurance coverage for conversion work, adjust renovation costs limits, and add the new room; keep permits, inspections, fire separation.
Conclusion
You start with an empty, drafty garage and end with a warm, regulated room—if you check structure, damp, and headroom first. You might want a gym or office, but you’ll need Building Regs compliance, safe electrics, and approved ventilation. Keep budgets realistic by pricing insulation, windows, heating, and floor build-ups with damp proofing and drainage. Add secure doors, sealed frames, and tested circuits, then finish with low‑VOC surfaces and smart storage—tight, quiet, and safe.