On one tight loft project, you can gain the feel of an extra room just by treating head height like a map, not a limitation. You start by zoning the space around where you’ll stand, sit, and store, then you build eaves cupboards and hidden wardrobes before anything else steals the footprint. You soften slopes with muted paint, warm textiles, and layered lighting that flatters beams and corners. But there’s one detail that decides whether it feels bespoke or merely squeezed in…
Decide the Purpose and Zone Your Loft Room
Before you pick paint colours or buy furniture, decide exactly what you want your loft to do—guest bedroom, home office, reading nook, or a flexible mix—then map it into clear zones that match the roofline.
Give each zone a job: sleep, work, store, unwind. Place the calmest activity furthest from the stairs, and keep the landing area open so the room feels welcoming.
Let furniture selection follow function: a slim desk that tucks under the window, a daybed with drawers, or a petite armchair beside a niche bookshelf.
Build storage into awkward corners with low cabinets and baskets.
Don’t forget ventilation planning early—position opening rooflights for cross-breezes and keep radiators or vents clear of bulky pieces.
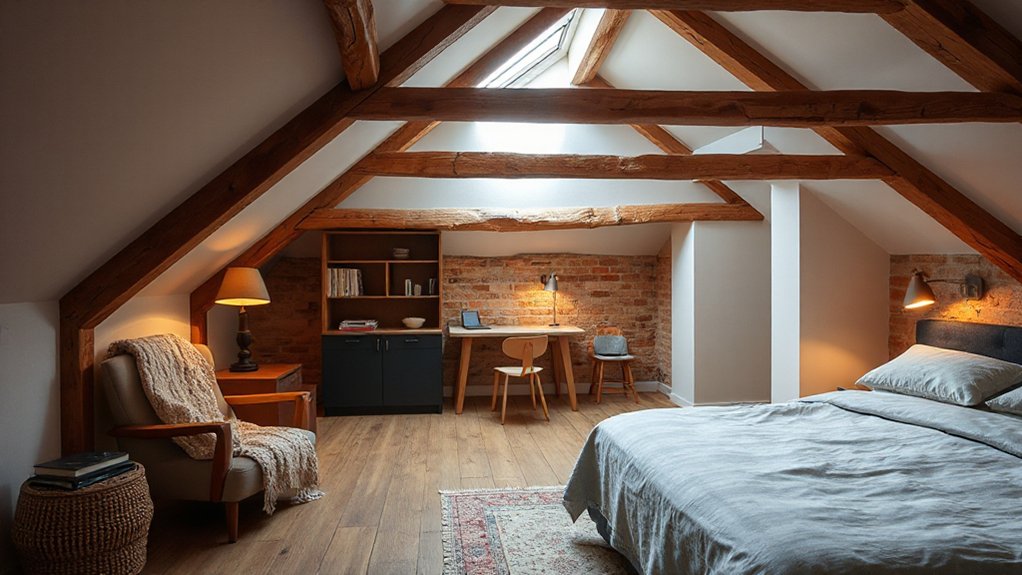
Plan a Loft Conversion Layout Around Head Height
Because loft rooms taper with the roof, you’ll get the most comfort by planning your layout around where you can stand fully upright. Mark the “full-height” strip first, then place everyday circulation and key moments there: the bed entry side, a reading chair, or the desk you’ll use daily.
Tuck lower-use pieces into the slopes so you don’t bump your head when you’re half-asleep.
Keep doors, stairs, and skylight access aligned with that tallest zone, and check headroom at the top step and beside any window seat.
When you’re positioning lighting, aim down the pitch to wash the ceiling and soften angles.
Finally, coordinate loft insulation with roof ventilation so the room stays snug without trapping moisture or overheating in summer.
Build Eaves Storage and Hidden Wardrobes Early
Where can you hide bulk without stealing precious headroom? Start at the eaves, and build storage before plasterboard goes up. You’ll frame low kneewalls, then set carcasses or simple stud bays sized for boxes, linens, and suitcases. Plan door swings and access panels so you don’t crawl or snag skirting later. Specify continuous Eaves insulation behind the units, tape the vapour layer, and keep a service void for cables so you don’t puncture airtightness.
Add a hidden wardrobe where the roof pitch drops: flush doors, push latches, and a full-height hanging zone at the tallest point. Slip in Hidden compartments—drawer plinths, lift-up bench lids, or a shallow safe—so valuables disappear in plain sight. Fit lighting now, and you’ll avoid messy retrofits.
Make Sloping Ceilings Look Designed, Not Awkward
You can make sloping ceilings feel intentional by turning the low zones into built-in storage—drawers, cupboards, and shelves that sit flush and keep sightlines clean.
Then you’ll balance the angles with strategic lighting: tuck LED strips along the eaves and aim wall lights upward to wash the pitch in a soft, even glow.
With storage doing the heavy lifting and light smoothing the lines, the ceiling reads like a design feature, not a compromise.
Built-In Storage Solutions
If your loft’s sloping ceilings threaten to turn every corner into dead space, built-in storage makes them look intentional and beautifully tailored. Run custom cabinetry along the knee walls so the roofline reads as a deliberate design move, not a compromise.
Keep doors flush and hardware minimal to prevent visual clutter, and match paint or veneer to your wall colour for a calm, cocooning feel. Add deep drawers for jumpers and linens, plus pull-out trays for awkward, low-clearance zones.
Where you need flexibility, install modular shelving in stepped heights that follow the pitch, creating niches for books, baskets, and keepsakes. Finish with soft-close hinges and discreet vents near eaves to protect stored items from heat and humidity.
Strategic Lighting Placement
Although sloping ceilings can scatter light and exaggerate odd angles, strategic placement turns the pitch into your loft’s best feature. Start by washing the eaves with slim wall lights or concealed LED strips; that soft ambient glow visually lifts the low points and smooths the roofline. Keep fittings tight to surfaces so the ceiling reads intentional, not cluttered.
Over your desk, dressing table, or reading chair, add focused task illumination: a directional sconce, adjustable spot, or a pendant dropped to the right height. Aim beams along the slope, not straight down, so shadows fall neatly and corners feel calmer.
Layer a central dimmable pendant with bedside lamps, then group switches by zone. You’ll control mood, avoid glare, and make every angle feel designed.
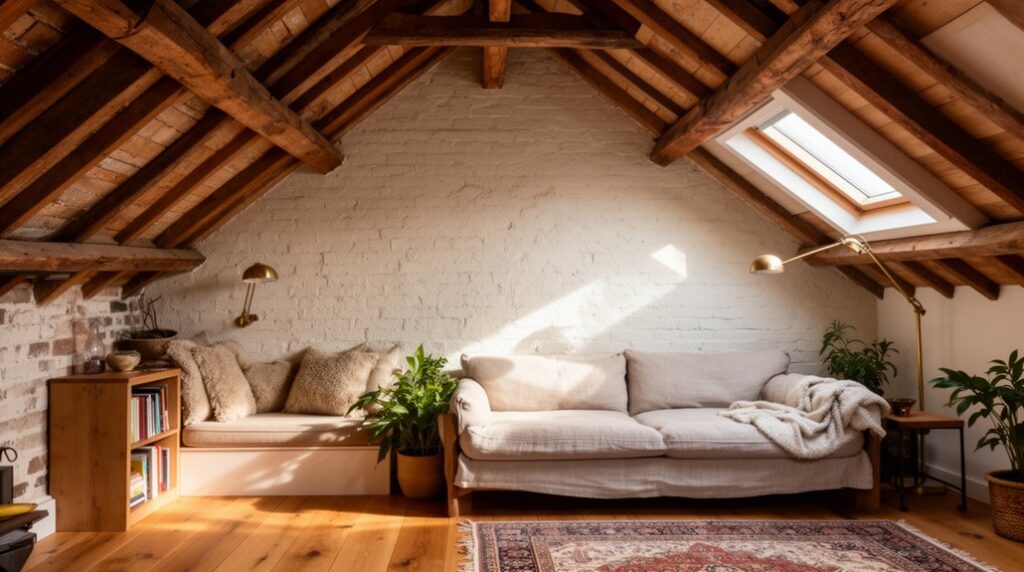
Choose Cosy Colours That Soften Angles and Beams
You’ll make steep angles and exposed beams feel gentler when you paint them in warm neutrals that blend into the roofline.
Choose muted tones on the walls to reduce sharpness and keep the loft feeling calm, not boxed in.
Then layer colour through texture—woven rugs, boucle cushions, and matte finishes—so the space reads cosy and considered.
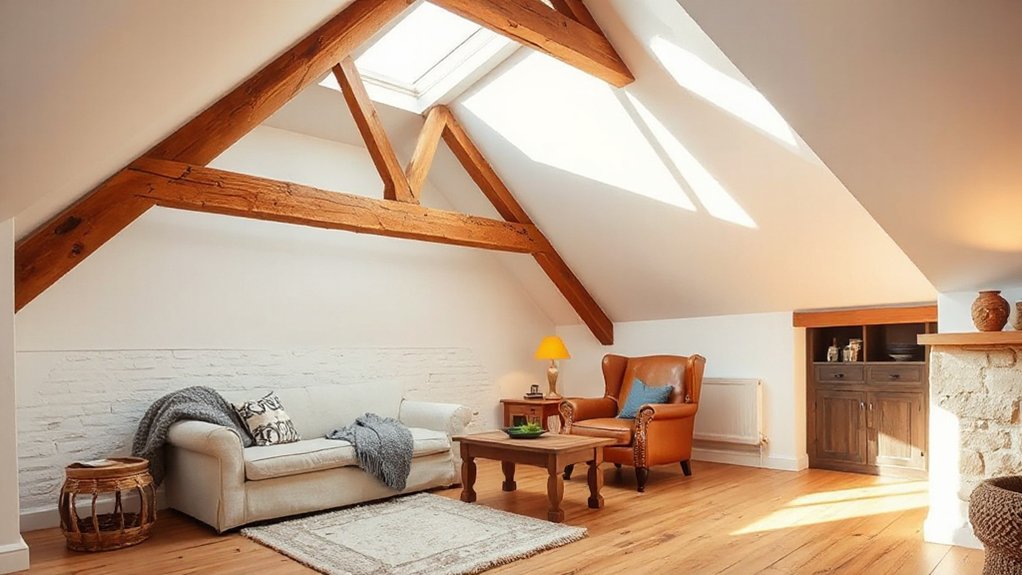
Warm Neutrals For Beams
When sloped ceilings and exposed beams carve up your loft, warm neutrals help everything read calmer and more cohesive. Paint beams a creamy off‑white, soft clay, or gentle greige to blur harsh junctions without losing character. If you love timber, try a light limewash or satin clear coat that warms the grain and keeps it airy.
Plan beams and lighting together: tuck slim spotlights beside rafters, or run a discreet LED strip along a beam’s edge to wash the ceiling evenly and reduce contrast. Keep walls a shade lighter than the beams so height feels generous.
Then layer neutrals and accents through boucle cushions, oak side tables, and brass hardware. You’ll get definition, depth, and a snug, continuous flow.
Muted Tones Reduce Sharpness
Because loft ceilings rarely offer long, uninterrupted planes, muted tones do the heavy lifting by softening every angle, beam line, and awkward junction. Choose smoky greys, dusty blues, and clay-tinted off-whites to blur harsh gradations where rafters meet plaster and where dormer cheeks cut into the slope.
You’ll notice visual softness increases when you keep ceiling and upper-wall colours close in value, so your eye travels smoothly instead of snagging on contrast. Paint beams a shade darker than the ceiling to reduce their “stripe” effect without losing character.
If you’ve got knee walls or boxed-in services, match them to adjacent surfaces so they recede. Keep trims understated, and you’ll make the whole loft feel calmer, wider, and more settled.
Layered Colour With Texture
Muted, low-contrast paint sets a calm baseline, but texture is what makes a loft feel properly cosy and intentional. Use warm greiges, clay, soft olive, or smoky blue to round off awkward roof angles and make beams feel considered, not bossy.
Keep your Color palettes tight: two neutrals, one muted accent, and a blackened metal or oak note for definition.
Then layer Texture combinations to stop sloped walls from reading flat. Pair chalky paint with limewash, add boucle or brushed cotton on built-in seating, and bring in ribbed wool throws to echo rafters.
Choose a low-pile rug to clear headroom yet soften footsteps. Finish with matte ceramics and aged brass, so light grazes surfaces instead of spotlighting every corner.
Warm Up Your Loft With Layered Lighting
Even if your loft conversion has gorgeous finishes, it won’t feel truly cosy until you layer the lighting to suit every nook and moment. Start with a soft ambient base: dimmable ceiling spots or discreet track lights that wash the slope without glare.
Add task lighting where you work and read—an adjustable wall light by the bed, a slim desk lamp, or under‑shelf LEDs—so you don’t rely on one harsh source.
Then bring in accent light to celebrate beams, alcoves, and decorative accents; a tiny picture light or LED strip can make details glow.
Let your furniture arrangement guide placement: pool light over a chair, float a pendant above a table, and keep switches within easy reach for zones.
Add Comfort With Textures, Rugs and Window Dressing
Once you’ve set the mood with layered lighting, you can make the loft feel genuinely inviting by building in touchable textures, anchoring the floor with a rug, and softening the angles with the right window dressing.
Start with Textured fabrics: a nubby wool throw, brushed cotton bedding, or a linen-blend sofa cover that won’t feel flat under sloping ceilings.
Layer one larger rug to define the main zone, then add a smaller runner where you step out of bed or pass a desk, keeping piles low for easy door swing and stair clearance.
For Window treatments, use ceiling-fixed tracks to cheat height and reduce draughts; pair sheer panels for daytime privacy with a lined blind for warmth at night.
Choose calm tones to keep it airy.
Add Character With Beams, Details and Finishing Touches
After you’ve nailed the cosy basics, let the loft’s quirks do some of the decorating by highlighting beams, trims, and small architectural details. Paint rafters a shade lighter than the ceiling to lift height, or stain them for Rustic finishes that warm the slope without crowding it. Keep junctions crisp with slim shadow-gap trims and tidy caulk lines, so angles look intentional.
Add character in tight footprints with Vintage accents that earn their keep: a brass picture light over the eaves shelf, an old timber stool as a bedside table, or reclaimed hooks by the stair. Swap standard switches for tactile dimmers, then repeat one metal finish across handles and lamp bases to reduce visual noise.
Finish with framed prints sized to knee walls, and a single handmade vase on the sill.
Frequently Asked Questions
Do I Need Planning Permission or Building Regulations Approval for a Loft Conversion?
You might not need planning permission if your loft conversion stays within permitted development, but you’ll need building regulations approval to meet Building codes and Loft safety—covering structure, fire escapes, insulation, stairs, ventilation. Always confirm locally.
How Much Does a Loft Conversion Typically Cost, Including Interior Finishing?
You’ll typically pay £35k–£75k all-in, like stitching a new room into your roof. Costs hinge on loft design complexity and material selection: stairs, insulation, electrics, plastering, bathrooms, joinery, plus finishes.
How Long Does a Loft Conversion Project Usually Take From Start to Finish?
You’ll usually need 8–12 weeks start to finish, though complex roof structure changes can stretch to 16. You’ll save time by planning loft storage early, keeping trades flowing and finishes snug, precise.
What Insulation and Ventilation Are Needed to Prevent Condensation and Overheating?
To stop condensation and overheating, you’ll use airtight Insulation types like PIR boards, mineral wool, or spray foam, plus a vapour barrier. Add Ventilation methods: continuous MVHR, trickle vents, and roof vents, keeping airflow balanced.
Can a Loft Conversion Add Significant Value to My Home?
Yes, you can add significant value, especially when you create usable, permitted square footage. Nail Loft design, choose smart lighting options, and keep storage built-in. Buyers notice airy headroom, quiet comfort, and crisp finishes.
Conclusion
When you shape your loft with purpose, you turn leftover roof space into a lantern-lit nest. You’ve zoned for head height, tucked clutter into eaves, and made slopes feel intentional with clean lines and soft colour. Layered lighting becomes your hearth, while wool, linen, rugs, and well-dressed windows muffle angles into calm. Finish with beams, vintage notes, and matched metals, and your loft reads like a quiet attic story—warm, lived-in, yours.