On one loft job, you gain 300 usable square feet only after moving a single purlin, like shifting a chess piece to open the board. You start by confirming head height, joist spans, and point loads, then align your permit set with local code. From there, you map zones around stairs, egress, and daylight paths, because window placement dictates furniture lines and circulation. But one constraint will set the entire plan…
Confirm Head Height, Loads, and Permits
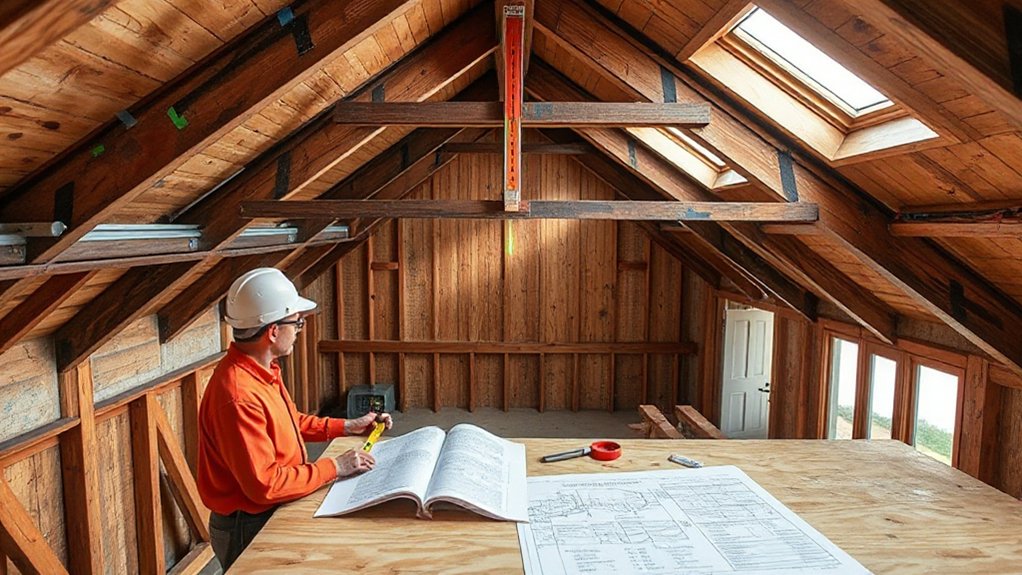
Before you sketch a floor plan or order materials, verify that the loft meets minimum head-height and structural requirements, then confirm what your local building department will allow. Measure head height along the ridge and at the eaves; map where you’ll fall below code thresholds due to slope or collar ties. Check access clearance at the stair opening and any dormer projections.
Evaluate loads next. Identify joist size, spacing, species, and span; compare to live-load requirements for habitable rooms. Confirm bearing paths to exterior walls or beams, and note any notches, drilled holes, or sag. Hire a structural engineer if you’re unsure.
Then secure building permits for structural changes, insulation, windows, and electrical work; schedule inspections early.
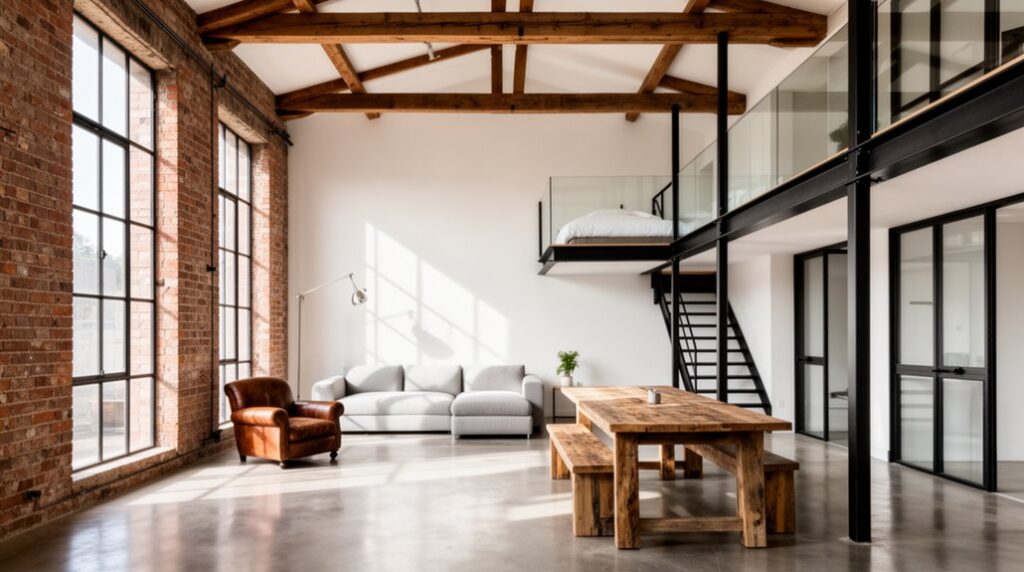
Plan Your Loft Conversion Layout and Zones
You’ll start by mapping clear functional zones—sleeping, cooking, bathing, and storage—against fixed constraints like stair position, roof pitch, and window placement.
You’ll set circulation paths with minimum clearances, align door swings and furniture footprints, and keep services clustered to shorten plumbing and electrical runs.
You’ll then tune the layout flow by prioritizing daylight to primary areas, buffering noise with partitions, and preserving sightlines to make the volume feel larger.
Define Functional Zones
Because a loft reads as one continuous volume, you’ll get the cleanest, most livable result by mapping clear functional zones before you commit to walls, stairs, or services. Start with a scaled plan and mark fixed constraints: structural bays, head-height lines under rafters, existing windows, and any chimney or steelwork.
Assign “loud” and “quiet” uses accordingly, then quantify each zone’s minimum clearances—bed circulation, desk depth, dining pull-back, and storage door swing.
Use lighting design to reinforce boundaries: task beams for worktops, low-glare ambient for lounging, and directional accents for display.
Lock in furniture placement early so sockets, data points, and radiator runs land where they’ll actually serve the room, not float mid-wall.
Optimize Layout Flow
Once you’ve pinned down what each zone needs, tune the layout so movement between them feels direct and unobstructed. Establish a primary circulation spine from stair landing to kitchen, living, and sleeping areas, and keep it 900–1100 mm wide. Align door swings and furniture edges to this path, and maintain 600–750 mm clearances around seating and bed sides.
Place storage and utilities along low eaves to prevent pinch points at full-height zones. Use rugs or floor material changes to cue *progressions* without adding barriers.
Reinforce wayfinding with Decorative lighting: linear track along the spine, task fixtures at work nodes, and dimmable ambient layers. Lock in Color schemes by zone but keep a shared base tone to avoid visual dead-ends.
Choose Stairs and Railings That Meet Code
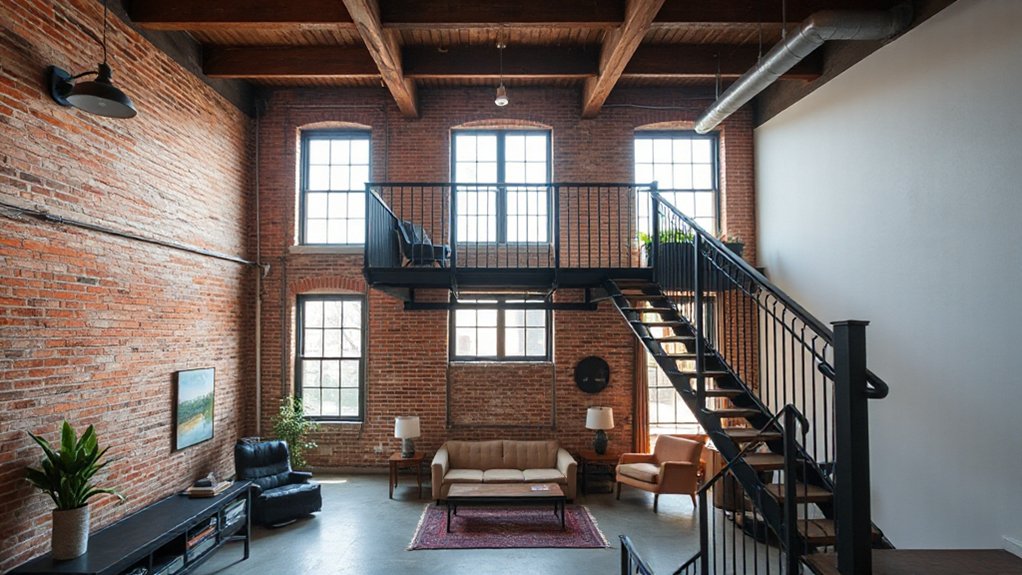
Before you frame walls or lay flooring, lock in a stair and guardrail layout that satisfies your local code, since the rise/run geometry and required headroom dictate where the opening lands and how much usable loft area you’ll keep.
Verify maximum riser height, minimum tread depth, and consistent nosing so each step reads identically underfoot.
Maintain required clear width and measure headroom vertically from nosing line to any beam or sloped ceiling.
Select staircase materials that can span your run without bounce, and anchor stringers into solid framing, not just subfloor.
Set guards at open edges and landings to code height, with infill spacing that prevents a pass-through.
Install a continuous handrail with code-compliant graspability to meet railing safety standards.
Add Roof Windows or Dormers for Light
Even if the loft’s floor plan works, it’ll feel cramped without daylight, so plan roof windows or dormers early to pull light deep into the space and open up usable headroom. Place openings between rafters to preserve structure, and align them with primary sightlines from the stair landing and seating zone.
For skylight installation, confirm roof pitch, select a unit sized to the rafter bay, and specify flashing kits matched to your roofing material to prevent leaks. Use multiple smaller roof windows to reduce glare and distribute luminance across sloped ceilings.
With dormer design, set the dormer face to square up a bedroom wall or desk niche, and coordinate its width with existing joist spans. Keep sill heights low for views and usable furniture clearance.
Insulate and Soundproof Your Loft Conversion
You’ll lock in comfort by fitting high-performance insulation between rafters and across the ceiling line, maintaining a continuous thermal layer while protecting ventilation gaps at the eaves.
You’ll cut airborne and impact noise by adding dense mineral wool in stud bays, resilient channels under plasterboard, and an isolated floor build-up with acoustic underlay and sealed perimeter edges.
You’ll get the best results when you treat the loft as a closed envelope—tape joints, seal service penetrations, and avoid rigid bridges that transmit sound and heat.
Choosing High-Performance Insulation
Because the roof plane and knee walls expose the largest surface area to exterior temperatures—and transmit the most airborne noise—select insulation that delivers high R-values per inch while controlling air leakage and moisture.
In tight rafter bays, you’ll often need closed-cell spray foam or high-density rigid foam to meet targets without deep framing changes; leave required ventilation channels where the assembly calls for them.
Seal every eave-to-ridge junction, wiring penetration, and top-plate gap so insulation isn’t bypassed by convective loops.
Pair thermal barriers with continuous interior air-sealing layers, then place moisture barriers where your climate zone and roof build-up require them to prevent condensation at the sheathing.
At dormer cheeks and gable ends, maintain uninterrupted coverage across corners to eliminate cold bridges.
Effective Loft Soundproofing Strategies
Although insulation boosts thermal performance, dedicated soundproofing targets the specific paths noise takes through a loft conversion—straight through the roof plane, laterally across knee walls, and structurally through rafters, joists, and dormer framing.
You’ll get best results by building mass, decoupling, and sealing every junction. Add Soundproof barriers: double-layer 15mm acoustic plasterboard with staggered seams, bonded with damping compound, then tape and seal perimeters with acoustic mastic.
Decouple ceilings and knee-wall linings on resilient channels or isolation clips, and stop flanking by running barriers continuously behind stud returns and around dormer cheeks.
Pack cavities with dense mineral wool, not foam, to control mid-high frequencies.
Finish with Acoustic treatments—thick carpet, underlay, and lined curtains—to tame internal reflections and soften footsteps.
Build Smart Storage Into Your Loft Conversion
Once you frame the loft, plan storage as part of the envelope instead of treating it like an add-on. Map knee walls, dormer cheeks, and rafter bays, then assign each void a function. Build continuous eave cabinets with access panels, and align door reveals with stud spacing so loads transfer cleanly.
Use storage solutions like drawer banks under low slopes, pull-out trays for deep bays, and recessed shelving between rafters where depth allows. For space maximization, integrate a landing closet at the stair head and a bench with hinged lids along the gable wall.
Keep service chases clear: separate plumbing stacks and electrical runs from storage cavities with rated barriers, and maintain ventilation paths at insulated rooflines. Add LED task strips inside compartments.
Choose Finishes That Keep Loft Character
To keep a loft conversion feeling like a loft, you should specify finishes that track the geometry of the roof and celebrate the original structure instead of flattening it. Follow rafters with tapered plaster lines or expressed trim, and keep junctions crisp where slopes meet gable walls.
If you insulate, use a vapor-open build-up and finish with timber boarding or lime plaster so surfaces read thin, not bulky. Restore brick and seal it matte; avoid high-gloss that kills Loft aesthetics.
Keep steelwork exposed, but fire-protect it with intumescent coatings tinted to the original tone.
For floors, choose wide boards or polished screed with movement joints aligned to beam lines.
Prioritize Material durability: abrasion-rated finishes, UV-stable oils, and washable, breathable paints throughout.
Furnish for Low Ceilings and Open Layouts
Because lofts often combine steep roof pitches with a single open plan, you’ll get better proportion and circulation if you furnish by “reading” the height zones rather than treating the space as uniformly tall. Map head-clearance lines, then assign low-profile seating, media, and storage under the eaves, keeping tall pieces only where you can stand.
For Furniture placement, anchor zones with rugs and align the longest sofa parallel to the ridge to preserve sightlines and walking paths. Float a dining table in the tallest bay and maintain 36-inch routes around it. Use backless benches and armless chairs to reduce visual mass.
For Lighting options, layer track along the ridge, wall-washers on knee walls, and pendants only in full-height areas with adequate drop clearance.
Frequently Asked Questions
What Does a Typical Loft Conversion Cost, Including Hidden Fees?
You’ll typically pay $30,000–$80,000 for a loft conversion. Hidden fees include structural engineer reports, Building regulations approvals, Roof insulation upgrades, party-wall notices, stair reconfiguration, electrical load upgrades, and fire-rated doors throughout.
How Long Does an Old Loft Conversion Usually Take From Start to Finish?
You’ll usually need 8–14 weeks start-to-finish, depending on structural complexity and access. Roof repairs can add 1–2 weeks, while Loft insulation fits after framing and services, before plasterboarding, finishing, and inspection sign-off.
Will Converting the Loft Increase My Home’s Resale Value?
Yes, it’ll likely boost resale value—coincidentally, when you open that dead attic volume, buyers see usable square footage. Secure Building permits, upgrade Loft insulation, and optimize stair placement, headroom, egress, and daylighting.
How Can I Control Heating and Cooling in a Converted Loft Space?
You’ll control heating and cooling by meeting insulation requirements at roof, knee walls, and floor, then adding temperature zoning with separate thermostats, dampers, or mini-splits. Seal penetrations, balance returns, and use ceiling fans for stratification.
Do I Need Separate Electrical Service or Panel Upgrades for the Loft?
You don’t always need separate service, but you’ll likely need a Panel upgrade if your existing capacity can’t handle added loft circuits. Run dedicated Electrical wiring for HVAC, lighting, outlets, and comply with load calculations.
Conclusion
You turn the old loft into a ship’s bridge: first you check head height, joist loads, and permits so the deck won’t fail. You plot zones like a chart, then fit code-compliant stairs and guardrails as safe gangways. You cut roof windows or dormers to steer daylight. You insulate and soundproof the hull, stash storage in the ribs, and choose finishes that honor the timbers. You furnish low, light, and clear.