You can cut heating and cooling costs fast by sealing the small gaps around your windows and doors, but you’ve got to find the leaks first and choose the right fix. Use smoke or a thin strip of tissue on a windy day to pinpoint drafts, then measure the openings at corners, jambs, thresholds, and sashes. Caulk handles stationary cracks; weatherstripping covers moving parts. The trick is picking materials that last without binding—because the next step is where most jobs fail.
Find Window and Door Air Leaks Fast

Before you buy caulk or weatherstripping, track down exactly where outside air is getting in, because sealing the wrong spots wastes time and money. Pick a windy day, shut off HVAC, and close all windows and doors so drafts stand out.
Walk the perimeter with your hand and a lit incense stick; smoke movement pinpoints leaks without buying tools. Check the window frame at sash corners, meeting rails, and where trim meets drywall.
For doors, focus on the door jamb, strike side, hinge side, and the threshold line.
At night, run a flashlight from outside while a helper watches inside; light lines reveal gaps.
Record each leak location and approximate length so you can estimate materials and avoid overbuying.
Decide If You Need Caulk or Weatherstripping
Now that you’ve found the leaks, you need to choose between caulk and weatherstripping based on the gap type and whether the joint moves.
Use caulk for stationary cracks and trim joints where you want a permanent, low-cost seal.
Use weatherstripping for operable sashes and doors that must compress and release.
Picking the right seal upfront cuts material waste, reduces callbacks, and delivers the best cost-per-BTU saved.
Caulk Vs. Weatherstripping
Where should you spend your money—caulk or weatherstripping—when you find a drafty gap? Use caulk for stationary joints: trim-to-wall seams, exterior casing cracks, and small, nonmoving gaps. It’s cheap per linear foot and cuts air leakage when you need an airtight, paintable seal.
But if the joint moves with thermal expansion, caulk can split unless the bead stays within its rated movement and you maintain material compatibility with siding, masonry, or vinyl.
Choose weatherstripping for moving interfaces: door slabs, window sashes, and thresholds. It costs more upfront, yet it survives repeated compression and keeps performance after thousands of cycles.
If you can open and close the part, you usually need weatherstripping; if you can’t, caulk wins fast.
Choosing The Right Seal
How do you decide whether a gap needs caulk or weatherstripping without wasting money? Check movement first. If the joint is static—trim-to-siding, casing-to-drywall, frame corners—use caulk. It bonds, blocks air, and stays cost-effective because you apply a thin bead once.
If surfaces move—door slabs, operable window sashes, thresholds—choose weatherstripping. It compresses repeatedly without cracking, so you won’t repay labor each season.
Match product to exposure and budget. For UV and temperature swings, prioritize material durability: exterior-grade siliconized acrylic or silicone caulk, and EPDM or silicone bulb seals over cheap foam. Include aesthetic considerations: paintable caulk for trim lines, low-profile seals that don’t snag or show.
Pick the Best Caulk for Window Gaps
Sometimes the cheapest tube of caulk ends up costing you more in drafts, repainting, and repeat labor, so pick a product matched to the gap size, surface, and exposure.
For narrow interior trim gaps, choose paintable acrylic latex; it’s low-cost and easy to tool, but it shrinks more.
For exterior window perimeters, use a high-performance silicone or hybrid (STPE/MS polymer) that stays flexible through temperature swings and UV, reducing callbacks.
Check Sealant compatibility with vinyl, aluminum, wood, masonry, and existing coatings; the wrong chemistry can fail adhesion or stain porous substrates.
Use backer rod for gaps over 1/4 inch so you don’t waste sealant.
Compare Caulk drying time and cure specs to your weather window; rain too soon ruins the bond.
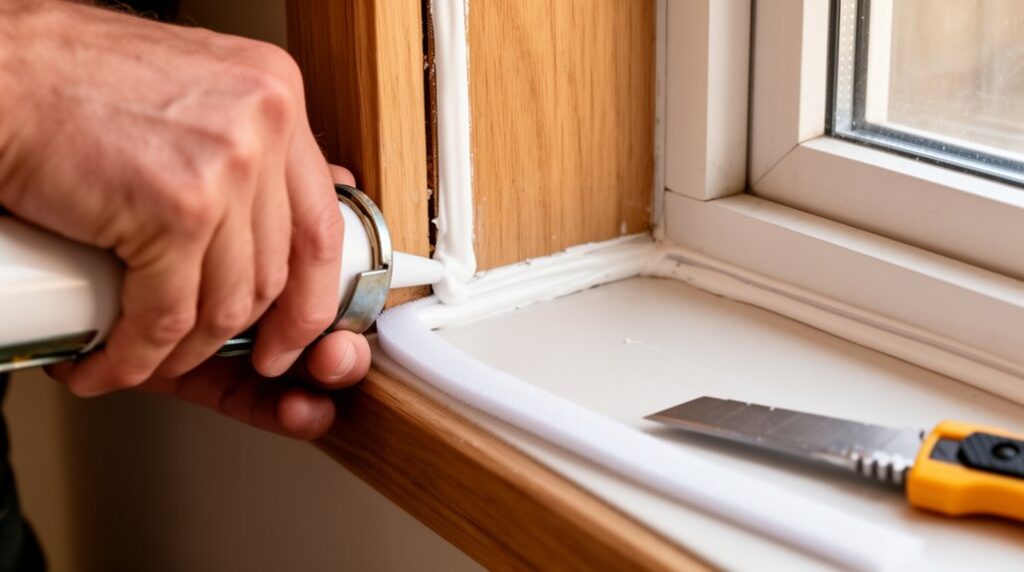
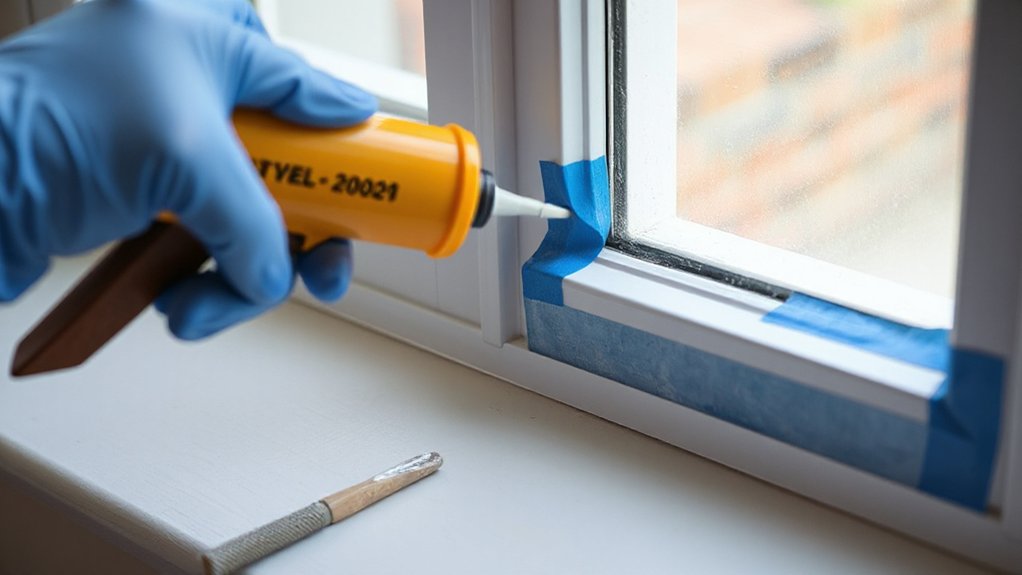
Apply Caulk Around Windows Without Mess
Even if you’ve bought the right sealant, you’ll waste money and time if you lay a bead that smears, skins over, or leaves cleanup headaches.
For clean Caulk application, tape both sides of the joint with painter’s tape, leaving a consistent gap width. Cut the nozzle at a 30–45° angle to match the joint size, then puncture the inner seal. Keep the gun at a steady speed and pressure so the bead stays uniform and you don’t overbuy material.
For Mess prevention, tool the bead immediately: wet your finger or a caulk tool lightly, pull once, and stop. Remove tape while the caulk is still wet.
Keep a damp rag nearby and wipe the nozzle between passes to avoid drips.
Add Weatherstripping to Stop Door Drafts
To stop door drafts without overspending, you need to match the weatherstripping type to the gap size and door movement—foam tape for tight, even gaps and V-strip or door sweeps for larger or uneven edges.
You’ll get the best seal when you clean the surface, measure precisely, and apply or fasten the strip in a continuous line with firm compression at closure.
Install it square and test the latch after each section so you don’t waste material or create binding.
Choose Proper Weatherstripping Types
If you choose the right weatherstripping for the gap size and the door’s movement, you’ll stop drafts without wasting money on materials that won’t seal or won’t last.
For tight, consistent gaps on door stops, use adhesive-backed foam: it’s cheap, fast to replace, but lower sealant durability under abrasion and UV.
For medium gaps and frequent cycling, choose V-strip (tension seal) in vinyl or spring metal; it maintains contact with less drag and lasts longer.
For door bottoms, pick a sweep for smooth thresholds, or a door shoe for uneven slabs and higher wear.
For large, irregular gaps, use compressible tubular rubber or silicone.
Match performance targets to your window insulation budget and expected traffic.
Install Weatherstripping Correctly
Choosing the right weatherstripping only pays off when you install it so it actually compresses and stays put through daily use.
First, clean the jamb and stop with degreaser, then dry it; dirt kills Sealant adhesion and wastes material.
Measure twice, cut square, and leave no stretched sections.
For adhesive-backed foam, press firmly for 30 seconds and keep the door closed for an hour so the bond sets.
For V-strip or spring bronze, align it to the crack and fasten every 2–3 inches to prevent waves.
Test closure: you should feel even resistance, not a slam.
If light shows at corners, miter cuts tighter or add a short overlap.
Correct install boosts Weatherstripping durability and lowers heating costs fast.
Seal Big Gaps With Foam Around Windows
Where do you turn when the gap between the window frame and rough opening is too wide for caulk or backer rod? You use low-expansion Foam insulation designed for windows and doors. It’s a cheap, high-payoff seal that cuts drafts and heat loss with one can.
First, remove loose debris and confirm the cavity is dry. Shake the can, attach the straw, and apply in short beads, filling only 30–50% so expansion doesn’t bow the jamb. Work from the bottom up and pause to let it rise.
After curing, trim flush with a utility knife and cover with interior casing or sealant to protect from UV. For odd voids, use flexible Gap fillers or foam backer blocks before foaming to reduce waste and cost.
Fix Door Sweeps and Thresholds That Leak

Because most exterior doors leak at the bottom, a worn sweep or a poorly seated threshold can waste more heat (and let in water and pests) than a dozen tiny frame gaps, yet it’s usually a low-cost fix with basic tools.
Start with a flashlight test at night; if you see light, measure the door width and buy a matching sweep ($10–$25) or adhesive sweep for metal doors. Remove the old sweep, clean the edge, then fasten the new one so it just brushes the threshold.
If the threshold is adjustable, raise it evenly until the gasket compresses without binding; replace cracked gaskets ($8–$20).
Finish with door hinge lubrication so the door closes squarely. Pair this with window frame reinforcement to keep overall openings stable.
Avoid Common Window and Door Sealing Mistakes
After you’ve tightened up sweeps and thresholds, don’t lose those gains by sealing the rest of the opening the wrong way. Don’t caulk over moving joints; it cracks fast and wastes money. Use backer rod plus elastomeric sealant on wide gaps, and keep the bead continuous.
Don’t block weep holes or drainage channels on window frames, or you’ll trap water and rot the sill. Skip low-grade foam around jambs; it can bow frames and ruin window aesthetics. Choose low-expansion window/door foam, and trim flush before casing goes back.
Don’t seal weatherstripping with paint; it stiffens and leaks. When you replace strip, match the profile to your door hardware clearances so latches seat without binding.
Check Your Seals and Measure Energy Savings
How do you know the caulk, foam, and weatherstripping you just installed are actually cutting costs? Start with a quick smoke-pencil or incense test on a windy day; any steady pull signals leakage.
Then log your thermostat setpoints and run-time for a week before and after sealing, keeping outdoor temps in mind. Compare utility bills using degree-day normalization so you’re measuring performance, not weather noise.
For tighter verification, schedule an Energy audit with a blower door test; you’ll get an ACH reduction that translates into estimated annual savings.
Recheck seals seasonally for shrinkage, cracked caulk, or compressed weatherstripping, and spot-fix immediately.
Treat remaining drafts as an insulation enhancement target: add jamb insulation or low-expansion foam where accessible.
Frequently Asked Questions
What Permits or Codes Apply to Sealing Windows and Doors in My Area?
You’ll usually skip Building permits for simple caulking or weatherstripping, but Local codes may require fire-rated materials, egress clearance, and historic-district approval. Call your city building department; a quick check prevents fines and rework.
Can Sealing Gaps Cause Moisture Problems or Mold in Walls?
Yes—if you air-seal without managing vapor and drainage, you can trap Moisture buildup, driving Mold growth inside cavities. You’ll reduce heat loss, but budget for ventilation, flashing, and compatible sealants to avoid costly remediation.
How Do I Seal Gaps Around Historic Windows Without Damaging Original Trim?
On a 1920s bungalow, you’d seal gaps using reversible rope caulk and compressible weatherstripping, avoiding nails or hard adhesives. For Historic preservation and Window restoration, you’ll add a stop-bead if needed; expect $10–$30/window.
Will Sealing Gaps Affect Indoor Air Quality or Require Added Ventilation?
Yes—sealing gaps can affect Indoor air quality if you reduce natural leakage too much. You’ll need Ventilation considerations: verify exhaust fans, guarantee HVAC fresh-air supply, or add a low-cost trickle vent or ERV.
Should Renters Seal Gaps, or Must Landlords Handle Window and Door Sealing?
You can usually handle minor sealing as DIY repairs, but you should notify your landlord and follow your lease; structural or warranty-related work needs landlord approval or professional services. Document costs, request reimbursement, and keep receipts.
Conclusion
With gaps sealed, you’ll feel the house settle—no cold ribbon of air curling at the sill, no whistle at the jamb. You’ve matched caulk to fixed cracks, weatherstripping to moving parts, and foam to wide voids, cutting heat loss where it’s cheapest to fix. Close the sash and door; they should press evenly, like a gasket. Recheck on a windy day, touch up thin lines, and track lower bills month to month.