You start by gearing up with safety glasses, gloves, and a dust mask, then you clear the area and stage a chisel, hammer, grout saw, utility knife, vacuum, thinset, and a matching replacement tile. You score the grout lines to isolate the break, fracture the tile toward the center, and pry pieces out without levering against adjacent edges. After you scrape old thinset to a flat, solid base, you’re ready to test-fit and set the new tile—but first you need to confirm the tile and grout match.
Gather the Tools to Replace Broken Tiles
Before you pry out a broken tile, gather and stage the right tools so you don’t improvise mid-repair or risk damaging adjacent tiles.
Put on PPE: safety glasses, cut-resistant gloves, knee pads, and a dust mask for silica.
For tool safety, inspect cords and batteries, confirm a GFCI outlet, and keep a vacuum ready to control debris.
Lay out a utility knife, grout saw or oscillating tool with grout blade, cold chisel, masonry bit, hammer, putty knife, and a small pry bar.
Add painter’s tape to protect edges, plus a bucket, trash bag, and cardboard for tile disposal.
Keep thinset, notched trowel, spacers, level, sponge, and clean water staged, then clear the work zone.
Match the Replacement Tile and Grout Color
Before you set the new tile, confirm the existing tile’s material and finish (glazed, matte, textured) so you don’t install a mismatched replacement that won’t sit flush.
Wear gloves and eye protection as you compare thickness and edge profile, and dry-fit the tile to verify alignment and surface sheen under the same lighting.
Then match grout by color and texture—use a small test patch and let it cure fully so you can confirm it blends before you grout the final repair.
Identify Tile Material And Finish
Even if only one tile is broken, you’ll get a cleaner repair when you identify the existing tile’s material (ceramic, porcelain, natural stone, or glass) and its finish (matte, satin, glossy, textured) before you buy replacements.
Put on cut-resistant gloves and eye protection, then inspect an intact tile in good light. Tap it: porcelain usually sounds denser and supports higher tile durability. Check the back edge or a removed shard for body color; through-body porcelain differs from glazed ceramic.
For natural stone, look for veining and pores; for glass, confirm translucency and thickness.
Next, compare surface texture by running a fingertip over the face and measuring slip resistance where needed. Match the finish level precisely to avoid lippage and noticeable glare under room lighting.
Blend Grout Color And Texture
Once you’ve matched the tile material and finish, you need to match the grout so the repair doesn’t telegraph as a patch. Put on nitrile gloves and a dust mask, then scrape out loose grout to clean, solid edges. Vacuum and wipe the joint so pigment bonds evenly.
Next, do color coordination: identify whether your grout is white, gray, tan, or custom, and if it’s sanded or unsanded. Buy small batches and mix test swatches on cardboard, letting them cure fully, since grout dries lighter.
For texture matching, match sand size and joint width; use sanded for wider joints to prevent cracking. Add water precisely, remix after slaking, then pack joints firmly. Tool to the original profile, and keep cure conditions consistent.
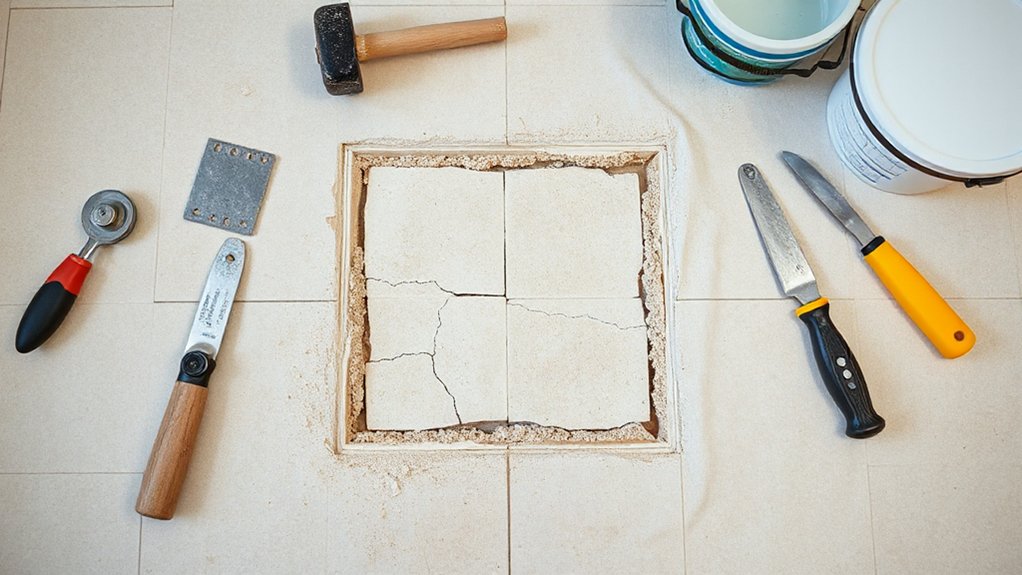
Remove the Broken Tile Without Cracking Others
Although it looks like a simple pry-and-pop job, you’ll remove a broken tile cleanly by isolating it, protecting adjacent edges, and controlling your chisel angle so the force stays centered.
Put on safety glasses, gloves, and hearing protection.
Score the grout joint around the tile with a carbide grout saw or oscillating blade, stopping at the substrate line.
Tape neighboring tiles with painter’s tape to prevent edge chipping.
Strike the tile’s center with a hammer to fracture it inward, then work from the middle outward.
Keep your chisel low and angled toward the cavity, not toward adjacent tiles.
Use careful prying only after loosening fragments, and lift pieces straight up.
Vacuum dust often for visibility, avoiding damage to surrounding grout lines.
Clean and Prep the Spot for a New Tile

Before you set a replacement tile, scrape every bit of old thinset and debris off the substrate with a stiff putty knife or margin trowel, keeping the blade flat so you don’t gouge cement board or tear waterproofing. Wear safety glasses, gloves, and a dust mask, and vacuum frequently to control silica dust during debris removal.
Use a utility knife to clear hardened ridges along edges, and pull out any loose spacers. Check the cavity for cracks, soft spots, or movement; repair or tighten the backing as needed.
Dry-fit the new tile to confirm depth and perimeter gap. Wipe the area with a damp sponge to remove fine dust, then let it dry completely.
Good surface preparation prevents hollow spots and lippage.
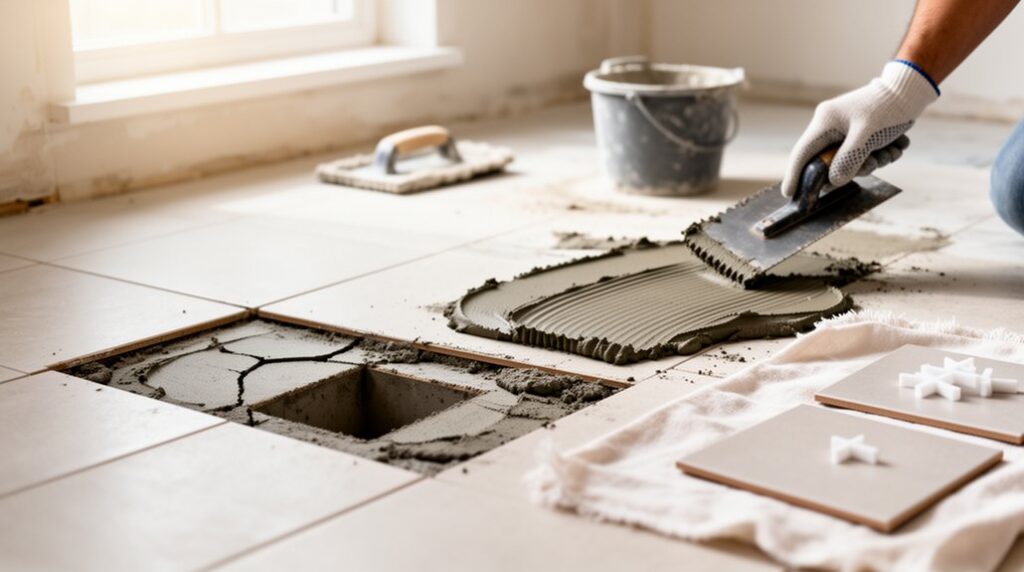
Apply Thinset and Set the Replacement Tile
Put on gloves and a dust mask, then mix the thinset to a peanut-butter consistency so it holds ridges without slumping.
Use a notched trowel to spread it evenly in the cavity, comb straight lines, and keep the bed uniform.
Set the replacement tile by pressing it firmly into the ridges, sliding slightly to collapse them, and aligning it flush with adjacent tiles and grout lines.
Mix Thinset To Consistency
Once the cavity is clean and dry, mix your thinset to a smooth, peanut-butter-like consistency that holds a notch without slumping.
Put on gloves, eye protection, and a dust mask before opening the bag.
Add cool, clean water to a bucket first, then pour in powder while mixing with a drill and paddle to reduce clumps and airborne dust. Mix 2–3 minutes, scrape sides, then let it slake 5–10 minutes and remix briefly.
Adjust only with small water or powder additions; don’t overwater or you’ll weaken bond and extend Thinset drying time.
Choose the right product for the substrate and room: among Tile adhesive types, use polymer-modified for most floors and wet areas, and rapid-set only if you can work fast.
Check pot life.
Trowel Thinset Evenly
When your thinset hits that peanut-butter consistency, spread it into the cleaned cavity with the flat side of a notched trowel to “key in” a tight bond to the substrate. Keep your gloves on, and avoid breathing dust by working slowly over the opening.
Next, add more tile adhesive and comb it with the notched side at a consistent angle, holding the trowel steady so ridge height stays uniform. Don’t overwork it; repeated passes can skin the thinset and weaken coverage.
For small repairs, you can back-butter a thin coat on the replacement tile’s underside to improve transfer, but keep the layer even. Check mortar consistency as you go—if it slumps or dries fast, remix or discard and batch fresh.
Press And Align Tile
After you’ve combed the thinset, set the replacement tile into the cavity and press it straight down. Then shift it slightly side-to-side to collapse the ridges and achieve full contact. Use a controlled pressing technique; don’t stomp or rock the tile, which can trap voids. Keep your fingers clear of sharp edges, and wear gloves if the tile is chipped.
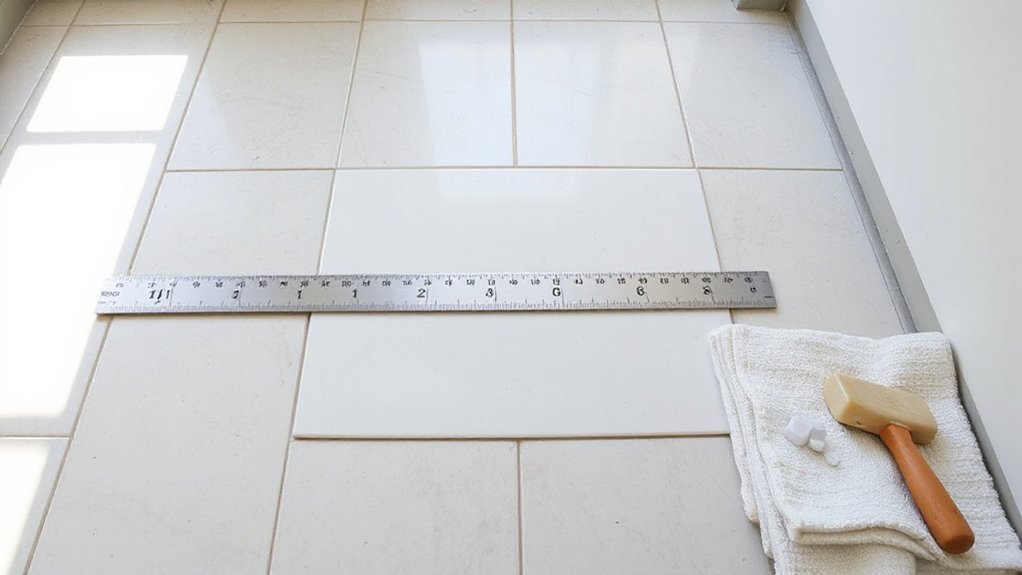
Check tile alignment immediately against adjacent grout lines and edges. Tap lightly with a rubber mallet and a wood block to bring the surface flush, verifying with a straightedge. Adjust before the thinset skins over.
Pull the tile once to confirm coverage (aim for near-100%); re-comb thinset if you see bare spots. Clean squeeze-out from joints with a margin trowel and damp sponge.
Let the Tile Cure Flat and Level
Although the thinset may feel firm within a few hours, you need to let the replacement tile cure undisturbed so it stays flat and level with the surrounding floor. For proper tile curing, block foot traffic and vibration, and keep pets out of the area. Don’t wash the floor or introduce water during the cure window.
Check the tile’s height with a straightedge across adjacent tiles, then confirm alignment with a small level. If you used leveling techniques like clips or wedges, leave them in place until the thinset reaches its specified set time. Remove spacers only if the tile won’t shift.
Maintain room temperature and avoid forced heat that can skin the mortar. Follow the thinset manufacturer’s cure schedule before applying any load.
Grout the Replacement Tile for a Seamless Blend
Once the thinset reaches its full cure time, grout the replacement tile to lock the edges in place and hide the repair line. Put on gloves and eye protection, then vacuum dust from the joints so grout bonds cleanly.
Verify joint depth is consistent and remove any thinset squeeze-out with a utility knife, cutting away from your body.
For color matching, use the same grout type (sanded or unsanded) and shade as the surrounding field, and mix to the manufacturer’s water ratio to avoid blotching.
Pack grout firmly with a rubber float held at 45°, forcing it into joints from multiple directions. Strike joints flush, then lightly wipe with a barely damp sponge to shape lines without washing them out.
Plan grout sealing after cure time.
Seal and Clean Up After Replacing Broken Tiles
When the grout has cured to the manufacturer’s schedule, seal it to block moisture and staining, then clean the tile face so the repair blends in. Ventilate the room and wear nitrile gloves and eye protection.
Choose sealing options based on location: use penetrating sealer for porous grout, or a topical sealer for high-gloss surfaces where allowed. Apply with a foam brush or applicator bottle, keep it off tile edges, and wipe excess within the dwell time to prevent haze.
Let it cure fully before getting it wet.
For cleaning techniques, start with a dry microfiber to remove dust, then use pH-neutral tile cleaner and a white nylon pad. Rinse twice, dry, and inspect under raking light for residue.
Frequently Asked Questions
How Much Does a Professional Tile Replacement Typically Cost per Tile?
You’ll typically pay $50–$150 per tile, including labor and materials. You’ll shut off water, isolate dust, wear PPE, and verify substrate. After setting, you’ll schedule grout cleaning and apply Tile sealing once cured.
Can I Replace a Tile Over an Existing Tile Without Demolition?
Yes, you can, if the existing tile is solid and flat. Degrease, perform grout cleaning, scuff-sand, apply a bonding primer, set tile with thinset. After curing, grout, then apply tile sealing. Wear PPE.
What Causes Tiles to Crack Repeatedly in the Same Area?
Like a hairline in ice, tile cracking repeats where movement persists: 1) Inspect subfloor/joists for flex. 2) Check thinset coverage, voids. 3) Probe moisture leaks. 4) Verify expansion gaps. Stop use; fix underlying damage.
Do I Need Building Permits to Replace a Few Broken Tiles?
You usually don’t need permits to replace a few tiles, but you must verify local building codes. Check your municipality’s permit process, confirm no structural/waterproofing changes, isolate power/water, use PPE, follow approved adhesives.
How Can I Prevent Future Tile Damage in High-Traffic Areas?
You’ll keep floors from taking a beating by installing mats, using felt pads, and setting a no-shoe zone. Do Grout maintenance, apply Tile sealing, clean spills fast, and avoid harsh chemicals. Wear gloves, knee pads.
Conclusion
You’ve rebuilt the floor like a shipwright replacing a cracked plank: safely, precisely, and without stressing the hull. You’ve suited up, gathered tools, matched tile and grout, and removed the damage inward to protect surrounding edges. You’ve cleaned to sound substrate, combed thinset evenly, and set the tile flat and level. After curing, you’ve grouted, wiped, sealed, and cleared debris—leaving a watertight, seamless deck.