You’re turning your farmhouse kitchen into the room where meals, homework, and quick check-ins actually work. Start by mapping traffic flow, setting a realistic budget, and deciding which charm stays—wide-plank floors, a vintage hutch, or old trim. Then plan smart storage by zone, a right-size island with clear walkways, durable counters, and lighting that shifts from prep to family time. The next choice determines whether it feels open—or just exposed…
Plan Your Farmhouse Kitchen: Budget, Flow, Must-Keep Charm
Before you pick cabinets or tile, map out how your farmhouse kitchen needs to work for your family—then set a budget that matches that reality. Track who cooks, who snacks, and where backpacks land, and sketch clear paths between sink, stove, fridge, and pantry.
Price the big-ticket items first: cabinets, counters, appliances, plumbing, and electrical, then hold 10–15% for surprises.
Decide what charm you’ll keep, not replace—maybe wide-plank floors, a built-in hutch, or original trim—and protect it in the scope.
Choose Farmhouse decor elements that earn their space, like a durable apron-front sink or open shelves for daily dishes.
Add vintage accents selectively—salvaged pulls, a restored light, or an antique rug—so the room feels rooted, not cluttered.
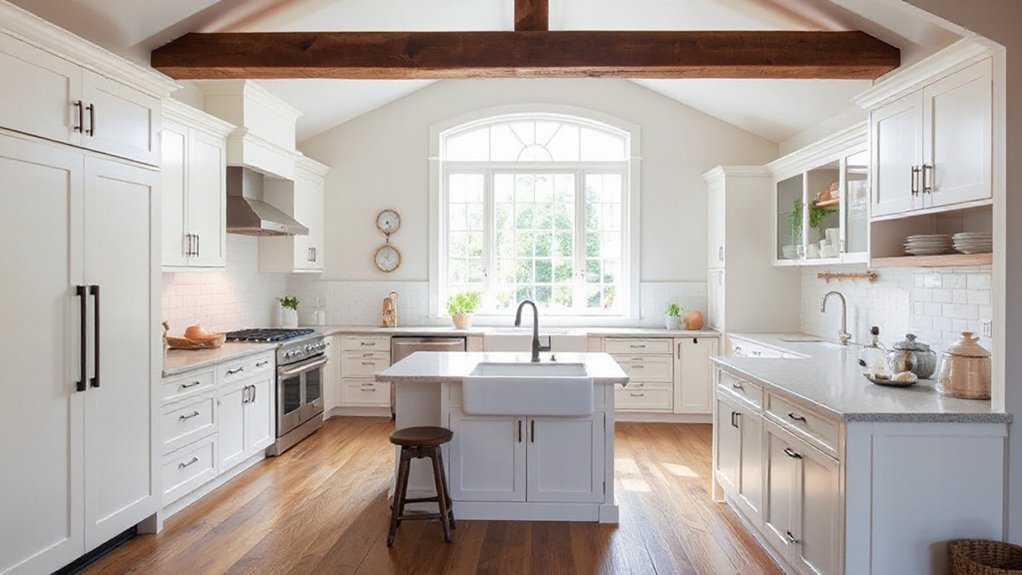
Open Up the Layout Without Losing Cozy Character
Although an open layout makes a farmhouse kitchen feel brighter and easier to live in, you don’t need to erase its cozy character to get there. Start by widening doorways or replacing a solid wall with a cased opening so you keep a defined kitchen edge. If you remove a wall, leave a ceiling beam or a shallow column line to signal zones and protect that tucked-in feel.
Keep family routines in mind: sightlines to the table and play area, plus a clear path from fridge to sink to range. Warm it up with Rustic decor like beadboard, a simple apron-front sink, and matte hardware. Add Vintage accents—a schoolhouse light, reclaimed stools, or an old runner—to soften the new openness without clutter.
Build Storage Into Every Farmhouse Kitchen Zone
You’ll keep a busy farmhouse kitchen running smoothly when you build storage into each zone, not just along the perimeter. Plan a pantry and dry-storage wall that keeps family staples visible and easy to grab.
Then set up workstation drawers with organizers so tools and lunch gear stay sorted. Add island and entry storage for backpacks, shoes, mail, and charging, so clutter stops at the door and the work surfaces stay clear.
Pantry And Dry Storage
Where do all the cereals, baking staples, snacks, and extra paper goods go when your farmhouse kitchen needs to run like a modern family hub? You’ll keep daily life smooth with a dedicated pantry zone that’s sized for your real routines, not just pretty shelves.
Prioritize pantry organization by grouping breakfast, lunchbox items, and baking into labeled bins, and reserve one “backstock” shelf for bulk refills.
Use clear, stackable canisters for flour, sugar, and grains so you can see levels fast and cut waste.
Add pull-out shelves or a shallow cabinet for cans and jars to prevent forgotten duplicates.
For dry storage solutions, think vertical: door racks for spices, adjustable shelves for tall boxes, and a kid-reach snack tier that limits grazing.
Workstation Drawer Organization
As soon as you treat each workstation like its own mini-hub, drawer organization starts doing the heavy lifting in a farmhouse kitchen that has to serve a busy family.
Give every zone a purpose: prep, cooking, baking, coffee, and cleanup. Place the tools you reach for first in the top drawer, and stage backups below. Use custom drawer inserts for knives, peelers, measuring tools, and wrap boxes so nothing shifts when kids grab and go.
Add a simple labeling system inside the drawer front or on dividers, so everyone returns items to the right slot. Keep one “grab drawer” near prep for scissors, pens, and tape, but cap it at one tray to prevent clutter.
Review drawers monthly and reset fast.
Island And Entry Storage
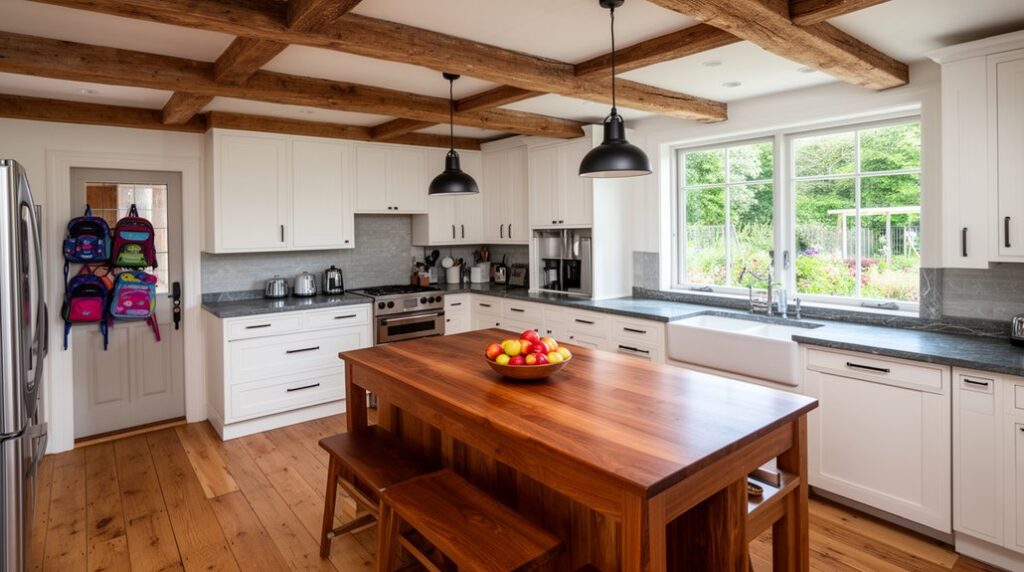
Because the island and the entry get hit first and hardest in a family kitchen, they deserve storage that absorbs backpacks, groceries, and daily clutter before it spreads. Give your island a mix of deep drawers for snack bins, a pull-out trash/recycle center, and an end-cap cabinet for lunch boxes or small appliances. Add a charging drawer so devices don’t camp on the counter.
At the entry, build a narrow drop zone: hooks at kid height, cubbies labeled by name, and a bench with lift-up storage for shoes and sports gear. Tuck a mail sorter and key tray into a top shelf.
Finish with Decorative accents like baskets and rail hooks, and tie it together with Vintage fixtures for durable, family-proof charm.
Add an Island That Fits Family Traffic and Seating
You’ll get the most out of your kitchen island when you right-size its footprint to match your room and how your family actually moves.
You can prevent bottlenecks by planning clear walkway zones around every working side, even during busy mornings and dinner prep.
Then you’ll build in family seating—stools, overhang, and legroom—so kids can snack, do homework, and keep you company without crowding the cook.
Right-Size Island Footprint
How big should your island be to keep a busy farmhouse kitchen moving without turning it into a bottleneck? Start by sizing it to your daily rhythm: lunch packing, homework spread, and weekend baking.
If you’ve got a smaller room, lean into small scale design with a compact footprint, then add function with smart overhangs and storage instead of extra length.
Aim for seating that matches how you actually gather—two stools for quick breakfasts, three only if everyone sits shoulder-to-shoulder comfortably.
Choose a depth that lets you prep on one side while kids perch on the other without crowding.
Keep corners softened or clipped to prevent hip-bumps and make it easier to pass around.
Plan Clear Walkway Zones
While the island often becomes the kitchen’s command center, it only works if you protect clear walkway zones around it, especially during the after-school rush. Aim for 42–48 inches of clearance on main routes and never pinch below 36 inches where two people pass.
Map the paths from fridge to sink, range to pantry, and kitchen to outdoor access, then keep those lines free of stools, pullouts, and trash drawers.
Place the island so doors and dishwasher can open without blocking traffic, and align it with the most-used entry.
If you’re planning garden integration, reserve a direct, uncluttered lane from the back door to the sink for muddy boots, harvest baskets, and quick hand-washing.
Mark zones with lighting and durable flooring transitions.
Build-In Family Seating
Once your walkway zones stay clear, the island can double as the family’s everyday seating without turning traffic into a bottleneck. Size it to your room: leave 42–48 inches behind stools for pass-through, and at least 36 inches where only one person works.
Plan 24 inches of counter width per seat, and 15 inches of knee space depth for comfort. Choose a durable overhang (12 inches minimum) and rounded corners so kids don’t clip hips.
Add cozy seating with wipeable, back-support stools or a built-in bench on the quiet side. Tuck outlets in the island end for homework chargers.
With smart spacing, you’ll host family gatherings while still cooking, cleaning, and moving freely.
Pick Durable Finishes: Floors, Counters, Cabinets
Because a farmhouse kitchen works hard every day, you’ll want finishes that can take spills, muddy boots, and constant traffic without showing their age.
Start with floors: choose sealed Rustic wood for warmth, or durable porcelain tile that mimics planks; add washable runners at entry paths.
For counters, prioritize stain resistance and easy wipe-downs—quartz handles juice, crayons, and hot pans with fewer worries than soft stone.
If you love butcher block, seal it well and use it on a low-risk zone like a baking nook.
For cabinets, pick quality plywood boxes, solid doors, and hardware rated for heavy use; soft-close hinges prevent slams.
Opt for matte finishes to hide fingerprints, and specify scrub-friendly paint or laminate for quick cleanup.
Blend Modern Appliances With Farmhouse Charm
Even if you’re upgrading to pro-style ranges and panel-ready fridges, you can keep the farmhouse feel by choosing appliances that work hard for family routines and fade into the background visually. Match panel fronts to your cabinet finish so the fridge reads like furniture, not machinery.
Pick a range in matte black, cream, or stainless, then ground it with a simple, easy-clean backsplash.
Use integrated dishwashers to cut noise during bedtime, and add a drawer microwave at kid height for safer reheats.
Choose a deep, quiet undermount sink and pair it with Vintage fixtures that deliver a strong spray for bottles and muddy hands.
Hide small appliances in an appliance garage, but keep Rustic accents—like wood shelves or iron pulls—nearby to tie everything together.
Layer Lighting for Cooking, Homework, and Hosting
While a farmhouse kitchen may look simple, it works best when you layer lighting so every zone supports real family use. Start with recessed or flush-mount ceiling fixtures on a dimmer for consistent ambient ambiance from breakfast to bedtime.
Add under-cabinet LEDs to keep shadows off cutting boards and the sink; that task illumination speeds prep and makes cleanup safer.
Hang pendants over the island, sized to clear sightlines, so you can cook while kids spread out homework nearby.
Install a brighter fixture over the table, then dim it for hosting and board games.
Tie it together with three-way switching at main entries, so anyone can adjust levels without hunting for a single switch.
Frequently Asked Questions
What Permits Are Required for Renovating an Older Farmhouse Kitchen?
You’ll typically need building, electrical, and plumbing permits, plus HVAC if you move ducting. If the farmhouse falls under Historical preservation, you’ll need approvals. Plumbing updates often require inspections to keep your family safe.
How Do I Test for Lead Paint or Asbestos Before Demolition?
You’ll protect your family by scheduling a certified Lead inspection and Asbestos testing before you demo. Don’t DIY sampling; hire accredited pros to collect chips or air samples, then review lab results. Plan containment.
Can I Claim Any Tax Credits for Energy-Efficient Kitchen Upgrades?
Yes—you can, because Uncle Sam loves your fridge’s feelings. Claim federal credits for qualified appliances, insulation, and windows; stack state rebate programs. Track receipts, model numbers, and efficiency ratings to maximize energy savings for kids.
How Long Will a Full Farmhouse Kitchen Renovation Typically Take?
You’ll typically need 8–12 weeks for a full renovation, depending on permits and lead times. Lock appliance placement early, choose your kitchen backsplash soon, and plan a temporary meal station to keep family routines running.
Should I Hire a General Contractor or Manage Subcontractors Myself?
You should hire a general contractor unless you’ve got proven trade coordination skills. Test the theory that DIY saves money: DIY challenges often create delays. Smart contractor selection protects your family’s schedule, budget, and safety.
Conclusion
You’re renovating like you’re turning an old barn into a bright common room: you keep the solid beams, but you widen the doors so everyone moves easily. You tuck storage into every stall, set an island like a sturdy table where kids land backpacks, and choose floors and counters that take spills without flinching. You hide modern appliances behind warm fronts and stack lighting like lanterns, task lamps, and stars for every hour.