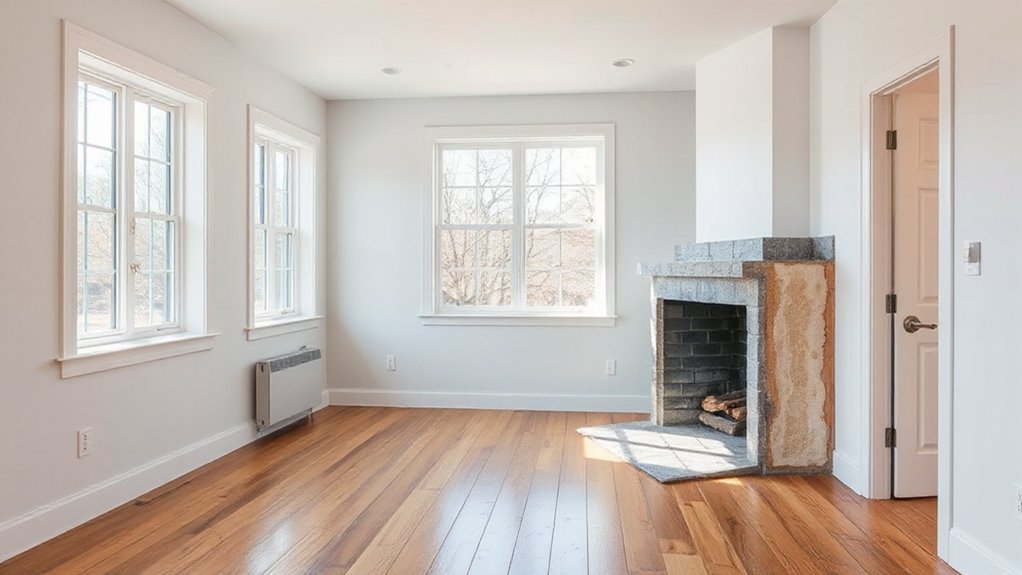
You walk into a 1970s bungalow and feel the chopped-up rooms hit you like speed bumps—most plans carve the footprint into eight-plus zones before you’ve even reached the back door. You can smooth that path by targeting one or two load-bearing openings, then pulling daylight through larger sliders, a new kitchen sightline, and a tight material set: matte oak, quiet stone, and flat-front cabinetry. But the first decision isn’t style—it’s where you cut.
Set Budget, Scope, and 70s-Era Priorities

Before you pick finishes or start swinging a hammer, lock down a clear budget and scope that respect what a 1970s bungalow is likely hiding. Start Budget planning by mapping every room’s footprint, ceiling height, and daylight path, then tie dollars to square footage and sequence.
Price demolition, disposal, and basic carpentry separately from visible upgrades, so you don’t steal funds from the backbone.
Use Priority assessment to rank changes that reshape how you live: opening the kitchen’s sightlines to the living area, widening tight hallways, and reworking the entry’s storage wall.
Keep materials consistent across zones—one oak tone, one hardware finish, one countertop family—so progression feel calm.
Reserve a contingency line for surprises, and lock choices early to prevent costly reorders later.
Check Permits, Load-Bearing Walls, and Hazards
Before you swing a hammer, you’ll map out permit requirements and timing so inspections line up with demolition, framing, and final finishes.
You’ll confirm which walls and beams actually carry roof and ceiling loads by tracing joist direction, header spans, and posts down to the foundation.
You’ll also test 1970s materials—popcorn ceilings, vinyl flooring, old paint layers, and damp corners—for asbestos, lead, and mold so you can contain, remove, and rebuild safely.
Permit Requirements And Timing
Even if you’re only shifting a doorway or opening up the living room, you’ll need to confirm permit triggers early, because 1970s bungalows often hide structural and safety issues behind drywall. Start with your city counter and ask how zoning regulations affect setbacks, height, parking, and new window openings facing neighbors.
If your block falls under Historic preservation review, expect design approvals before construction drawings can be stamped, and budget extra weeks. Schedule asbestos and lead testing before demolition so you don’t stall when inspectors spot suspicious mastic, popcorn texture, or old vinyl.
Sequence permits around long-lead materials: order the slimline sliders and engineered flooring after rough approvals, not before. Keep a site plan, fixture cutsheets, and HVAC layouts ready so revisions don’t reset your calendar.
Identifying Load-Bearing Structures
Once you’ve mapped your permit path, pin down what actually carries the house, because a widened opening in a 1970s bungalow can turn from “simple framing” into an engineered beam and upgraded connections overnight.
Start in the basement or crawl: trace joists to bearing points, check posts, beams, and any doubled joists landing on concrete pads, and note foundation stability at cracks, sill plates, and anchor bolts.
Upstairs, follow roof loads—rafters, ridge, and ceiling joists—to stacked walls or concentrated points.
In the main level, look for walls running perpendicular to floor joists, built-up headers over openings, and continuous studs aligned below.
If you must cut, plan wall reinforcements: temporary shoring, new LVL/steel, proper hangers, and verified load paths.
Document everything for your inspector and engineer.
Asbestos, Lead, And Mold
Assume trim, windows, and stair stringers may carry lead paint; you’ll need HEPA sanding rules, wet methods, and protected pathways from work zone to exterior.
Track moisture like a map: under bathroom tile, along basement sill plates, and behind north-wall insulation.
Fix the leak first, then remove moldy gypsum and soft studs.
Open Up the 1970s Bungalow Layout (Smartly)
Because many 1970s bungalows were chopped into tight rooms and narrow corridors, you’ll get the biggest payoff by opening the plan selectively—removing the partitions that block sightlines and daylight while keeping the walls that carry loads, hide ductwork, or buffer sound.
Start by mapping structure: confirm joist direction, locate beams, and plan a single wide opening between kitchen and living rather than a full gut. If you need support, specify a flush LVL with steel flitch plates, then wrap it in gypsum to keep the ceiling plane clean.
Use built-ins to replace lost storage: a low credenza can define zones without walls. Preserve character where it counts—restore Vintage fixtures and patch wall textures so old meets new seamlessly.
Tune acoustics with solid-core doors and pocket panels where needed.
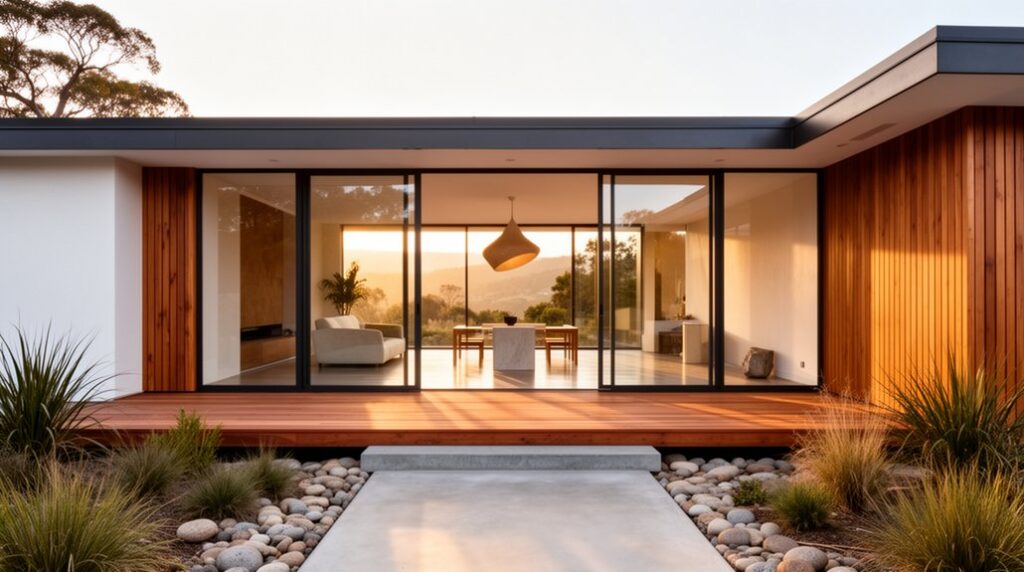
Add Daylight: Windows, Doors, Skylights
If you bring daylight deeper into a 1970s bungalow, the whole renovation reads bigger, calmer, and more contemporary without adding a single square foot. Start by enlarging key openings, not every wall: widen the living-room window to align with sightlines and lower the sill to pull the yard into the room. Use slim, dark aluminum or thermally broken steel-look frames to sharpen edges and boost glass area.
Treat door placement as a daylight strategy. Shift a patio slider so it centers on the main circulation path, and add a glazed rear door at the kitchen corner to bounce light across counters.
For dim interiors, target skylight installation over hallways or a central bath; flare the shaft and paint it matte white to spread sun evenly.
Plan Lighting and Electrical Before Closing Walls
Before drywall goes up and trims hide the studs, map every circuit and lighting layer so the renovated bungalow feels intentional, not patched together.
Walk each room and mark task, ambient, and accent zones: under-cabinet strips at the oak counters, wall grazers for textured plaster, and a centered pendant over the dining table.
Place switches where your hand naturally lands at entries, then add three-way control for hall runs and bedside sconces.
Specify warm-dim LEDs, deep boxes for dimmers, and conduit paths for future upgrades.
For Smart lighting, prewire neutral at every switch and locate the hub near the panel.
Keep Electrical safety tight: dedicated kitchen/bath circuits, AFCI/GFCI protection, labeled runs, and nail plates where cables cross studs.
Tighten Comfort: Insulation, Windows, HVAC
Once you’ve opened the walls and exposed the roofline, lock in comfort by tightening the bungalow’s envelope and matching the HVAC to the new load. Dense-pack cellulose in stud bays, then add a continuous layer of rigid mineral wool outside to break thermal bridges at rim joists and slab edges. Air-seal top plates, can penetrations, and window rough openings with tapes and low-expansion foam.
Replace leaky sliders with fiberglass or thermally broken aluminum units, set flush to your new drainage plane, and flash to the WRB.
For Soundproofing techniques, decouple bedroom walls with resilient channel, use mineral wool batts, and specify solid-core doors.
Right-size a variable-speed heat pump with zoned ducting, keep returns out of hallways, and compare smart thermostat options to manage schedules and humidity.
Rework the 1970s Bungalow Kitchen for Flow
You’ll shift the kitchen’s 1970s compartmentalized footprint into an open plan by relocating or trimming partitions so circulation lines up cleanly with the living and dining zones.
You’ll tune the work triangle—sink, range, fridge—so each leg stays tight and unobstructed, with durable stone or stainless landing zones that prevent bottlenecks.
You’ll build storage that runs flush and continuous, then protect sightlines with disciplined upper-cabinet placement so the room reads long, bright, and calm from the entry.
Open-Plan Layout Shifts
Although 1970s bungalow kitchens often feel pinched off by half-walls and narrow doorways, you can rework the layout for true flow by clearing sightlines from the entry through to the living zone and backyard glazing. Replace stubby partitions with a structural beam and a flush ceiling plane so circulation reads as one continuous band.
Anchor the kitchen with a low island that doubles as a landing strip, then set your furniture arrangement to keep a straight walking lane behind stools and past the dining table. Use matching oak or ash flooring to stitch old and new, and repeat cabinet veneer on a nearby media wall for visual calm.
Control spread-out sound with acoustic design: slatted timber battens, wool rugs, and fabric dining chairs that soften clatter.
Work Triangle Optimization
When you optimize the work triangle in a 1970s bungalow kitchen, you’re really calibrating the sink, cooktop, and fridge so prep, cooking, and cleanup read as one smooth loop rather than a series of dead-end pivots.
You start by measuring clearances: keep 42 inches for a single cook, 48 for two, and prevent door swings from colliding at corners.
Relocate the sink to face the main run, then slide the range onto an exterior wall for a shorter vent path and cooler cabinet surrounds.
Set the fridge at the triangle’s entry, so grocery drop-off doesn’t cut through the hot zone.
Use durable quartz or soapstone at landing zones beside each node; that surface continuity boosts Work efficiency and guides space planning.
Storage And Sightlines
Once the work triangle runs clean, storage and sightlines decide whether the room feels open or still boxed in by 1970s clutter. You’ll want uppers that stop short of the ceiling only if you can hide bulk elsewhere; otherwise, run them full height in matte laminate or painted oak to erase dust ledges and visual chop.
Shift tall pantry and fridge panels to one wall so your main view line from entry to window stays uninterrupted. Keep counters spare by assigning zones: pull-out trays for small appliances, deep drawers for pots, a vertical slot for boards.
Fine-tune furniture arrangement by floating a slim island with waterfall quartz and toe-kick lighting. Use decorative accents sparingly: one ceramic bowl, one rail of brass hooks.
Update Bathrooms With Modern, Warm Details
Before you touch tile or plumbing, map out how each bathroom should feel and function from the doorway in—sightlines to the vanity, clearances around the shower, and where warm light will land on skin and stone.
Then set the mood with layers: dimmable sconces at face height, a low-glare ceiling wash, and a nightlight niche near the toe-kick.
Keep surfaces tactile and calm. Pair matte porcelain with honed stone thresholds, and run the same floor tile into the shower to widen the footprint.
Choose a wall-hung vanity to open the sightline and simplify cleaning, but add warmth with oak fronts and a slim brass rail.
If you’re keeping Vintage fixtures, replate them. Use Retro color schemes as accents—sage, clay, or butter—on grout, paint, or towels.
Choose a Whole-Home Palette + Indoor-Outdoor Flow
Carry that same warm, tactile bathroom mindset into the rest of the bungalow by locking in a whole-home palette that reads as one continuous sequence from entry to patio. Keep walls a soft mineral white, run matte oak or cork underfoot, and repeat blackened-bronze hardware so sightlines feel calm.
Use Color harmony to guide connections: shift only one variable at a time—tone, sheen, or texture—so the living room doesn’t fight the kitchen. Continue the same grout color, slab edge profile, and cabinet toe-kick height to preserve scale.
For indoor-outdoor flow, match the interior floor to a slip-resistant exterior paver in a near value, then align joints through the slider. Add a cedar soffit and planters to lock in outdoor harmony. Keep lighting temperature consistent, too.
Frequently Asked Questions
How Do I Blend Mid-Century Furnishings With a Contemporary Bungalow Renovation?
Blend Mid century style with Contemporary design by anchoring rooms with clean-lined casework and neutral walls, then layer teak, walnut, and iconic silhouettes. You’ll repeat warm wood tones, matte metals, and low-profile upholstery across open sightlines.
What’s the Best Way to Reduce Renovation Noise for Neighbors and Family?
Schedule loud demo mid-day, notify neighbors, and seal work zones. Use soundproofing strategies: hang mass-loaded vinyl, add door sweeps, lay rubber mats. Apply noise mitigation techniques: quiet tools, temporary insulation baffles.
Should I Live in the Home During Renovation or Relocate Temporarily?
Relocate temporarily if you’re opening walls or refinishing floors. About 50% of homeowners report major stress during remodels. Temporary living shortens your renovation timeline, protects dust-sensitive finishes, and keeps utilities stable per room.
How Do I Source Matching Materials for 1970S Brick, Siding, or Trim?
Start by salvaging from hidden areas, then visit architectural salvage yards and reclaim dealers for Vintage charm and Material consistency. You’ll match profiles with on-site samples, photograph courses, check lot numbers, and custom-mill trim.
What Upgrades Add the Most Resale Value to a Renovated 1970S Bungalow?
You’ll boost resale most with kitchen/bath remodels, open sightlines, and curb-appeal entry updates. Add Energy efficient windows, keep Vintage fixtures, refinish hardwood, upgrade insulation/HVAC, and choose durable quartz, solid-wood cabinetry, and coherent trim.
Conclusion
You’ve turned a closed-off 1970s bungalow into a calm, contemporary retreat by planning the budget, protecting the structure, and prioritizing what matters. You’ve opened key sightlines, widened circulation, and kept support where it counts. You’ve pulled in daylight with larger glazing and skylights, and you’ve layered lighting before the drywall goes up. You’ve sealed drafts with insulation, upgraded HVAC, and unified rooms with matte oak, quiet cabinetry, and an easy indoor-outdoor threshold.