On your first walk through a converted stone barn, you’ll often find a thumbprint in the limewash, like a signature that tells you what to keep. You start by auditing the stone, trusses, and ironwork, then plan circulation so sightlines land on the best craftsmanship. You layer lime plaster, reclaimed timber, and blackened steel, and keep the palette calm and earthen. But the real test comes when you add comfort without losing truth…
Audit and Protect Original Stone Barn Features
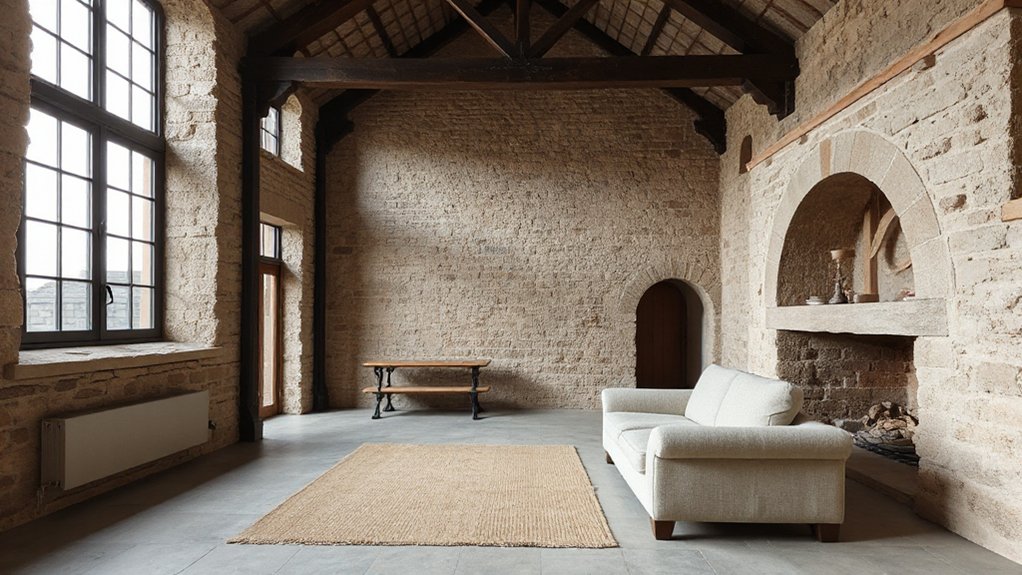
Before you add insulation, plaster, or built-ins, walk the barn like a surveyor and record what’s original—and what’s vulnerable. Photograph each wall, arch, and threshold; map damp staining, salt bloom, cracks, and past cement patches. Label the Original structure: stone thickness, timber trusses, joists, lintels, and the old hearth or feed openings.
Protect surfaces before you decorate. Keep stone exposed where it can breathe, and specify limewash or lime plaster instead of gypsum. Rake out failed hard mortar and repoint with lime to match color, aggregate, and joint profile. Treat beetle-prone timbers, cap active leaks, and improve drainage outside so interior masonry stays dry.
Preserve tool marks, iron hardware, and worn thresholds—they carry the barn’s Historical significance.
Set the Layout First: Traffic Flow and Sightlines
Once you’ve logged what’s original, set the layout by tracing how you’ll actually move through the barn and what you should see first. Stand at the main threshold and map sightlines to the best masonry bay, the timber truss, or the old threshing door, then protect that view from bulky furniture and tall partitions.
With open floor plans, you still need traffic management: keep a clear spine from entry to hearth, kitchen, and stairs, and avoid pinch points at door reveals and around posts. Use rugs, a long table, or a low settle to suggest zones without cutting the volume.
Align circulation with existing openings and beam lines, and let the stone piers anchor pauses and turning points naturally.
Choose a Stone Barn Palette (Earthy, Warm, Calm)
Although a converted stone barn can handle bold color, you’ll get the most convincing result by building a quiet, earthy palette that echoes the masonry’s undertones and lets age-worn materials lead.
Start by reading the stone in daylight: note whether it leans honey, ash, or iron, then choose wall tones in softened clay, oatmeal, or chalky taupe. Keep trims and ceilings a shade lighter to preserve height without looking “new.”
For warmth, add muted ochres, smoked terracotta, and worn-leather browns through textiles and painted pieces, not glossy blocks of color.
Anchor calm with lichen greens, stormy blues, and off-black accents used sparingly.
Prioritize Color coordination across rooms by repeating two neutrals and one accent.
Let material blending guide sheen: favor matte, mineral finishes over slick acrylics.
Combine Timber, Lime Plaster, Stone, and Metal
When you layer timber, lime plaster, stone, and metal with intention, the barn keeps its honest, worked-for character while gaining comfort and clarity.
Keep the masonry legible: rake back crumbling cement and repoint with breathable lime so joints sit softly against the stone. Let Lime plaster textures run imperfectly over new partitions and nib into reveals, so edges feel hand-finished, not boxed-in.
Add Timber accents where hands land—oak thresholds, window boards, a reused beam as a mantle—then oil them, don’t lacquer.
Introduce metal as the crisp counterpoint: blackened steel door frames, strap hinges, or a simple handrail with visible fixings.
Repeat proportions—wide stone, slimmer timber, finer metal—so the mix reads deliberate, rooted, and enduring.
Light a Converted Stone Barn for Warmth and Height
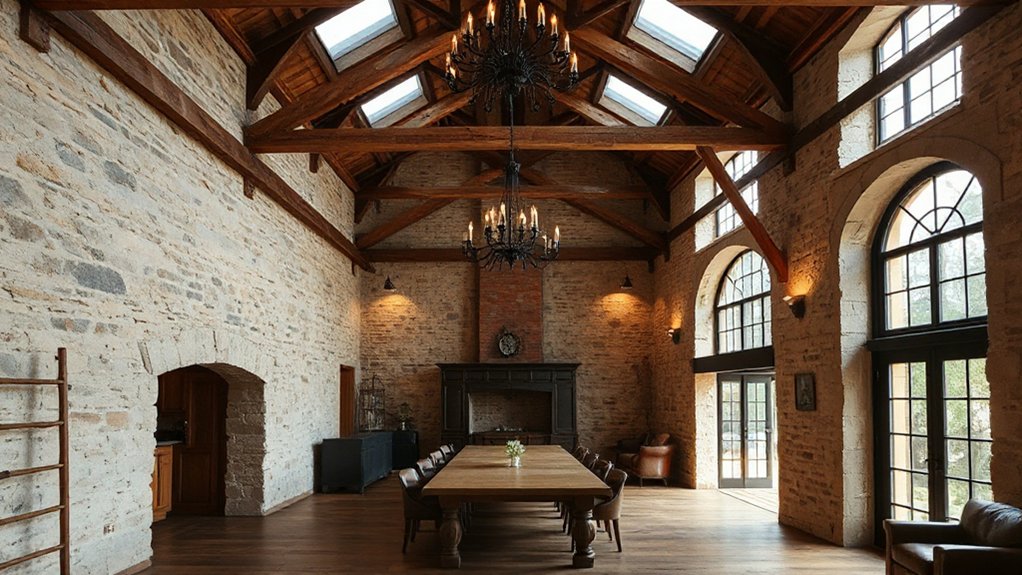
You’ll get the best from a converted stone barn when you layer ambient lighting—soft pendants, discreet wall lights, and low-level pools—so the space feels lived-in after dark.
You can emphasise the barn’s vertical volume by lifting light into the trusses and ridge line, letting the roof height read clearly without glare.
Then you’ll warm the room with gentle stone wall washes that graze the texture, picking out limewashed joints and honest tooling marks.
Layered Ambient Lighting
Because stone walls and lofty rafters swallow light, layered ambient lighting gives your converted barn both warmth at eye level and a gentle lift through the full height of the space.
Start with dimmable, warm-white sources that respect the barn’s age: shallow uplight bowls on timber ledges, discreet wall washers set into lime-plastered reveals, and soft floor lamps beside seating.
Choose fittings that feel forged, not flashy—blackened steel, aged brass, hand-thrown ceramic—so the light sits comfortably against natural textures like oak beams, flagstones, and rough mortar.
Add statement fixtures only where they earn their place: a broad iron pendant over the table or a cluster of opaline globes in the entry.
Put everything on separate circuits so you can layer glow for dinner, reading, or quiet evenings.
Highlight Vertical Volume
Although the barn’s height feels dramatic in daylight, it can read cavernous after dark unless you deliberately “lift” the light up the stonework and into the rafters. Hang a simple iron or aged-brass pendant on a long drop so the glow sits closer to human height, then let it spill upward to acknowledge the trusses.
Use discreet uplights on tie beams or collar beams to trace timber joinery and celebrate soot-darkened grain, without over-brightening the room. Add slim picture lights above salvaged doors, hay forks, or framed farm maps to pull the eye vertically and reinforce vertical spaciousness.
Keep lamp shades in linen, parchment, or hand-thrown ceramic so the warmth reads honest against limewash, and your architectural proportions stay balanced.
Warm Stone Wall Washes
When dusk settles in, a gentle wall wash turns rugged stone from a dark boundary into the barn’s warmest feature. You’ll lift the room’s mood without hiding its age, because the light skims every chisel mark, lime mortar joint, and patch of soot that tells the building’s story.
Choose warm LEDs (around 2700K) and conceal linear fittings at skirting height or on beams, aimed up the face to stretch perceived height. Keep the beam wide and even, so Rustic textures read as soft relief, not harsh glare.
Add dimmers to shift from task brightness to firelight calm. In the name of Historic preservation, avoid chasing conduits across original masonry; route wiring through existing voids, timber service runs, or reversible surface channels that you can remove later.
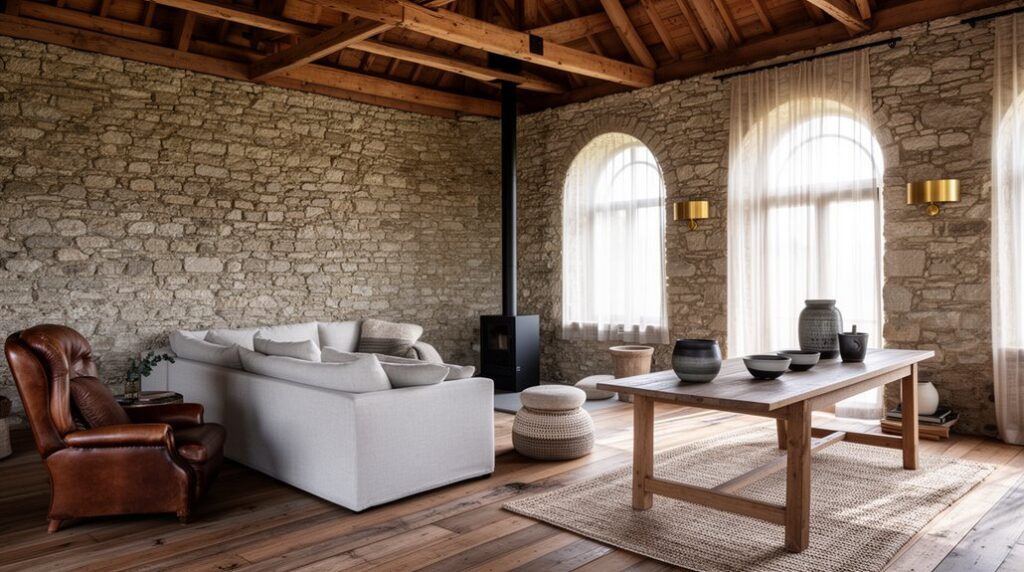
Create Cosy Zones Without Breaking the Open Feel
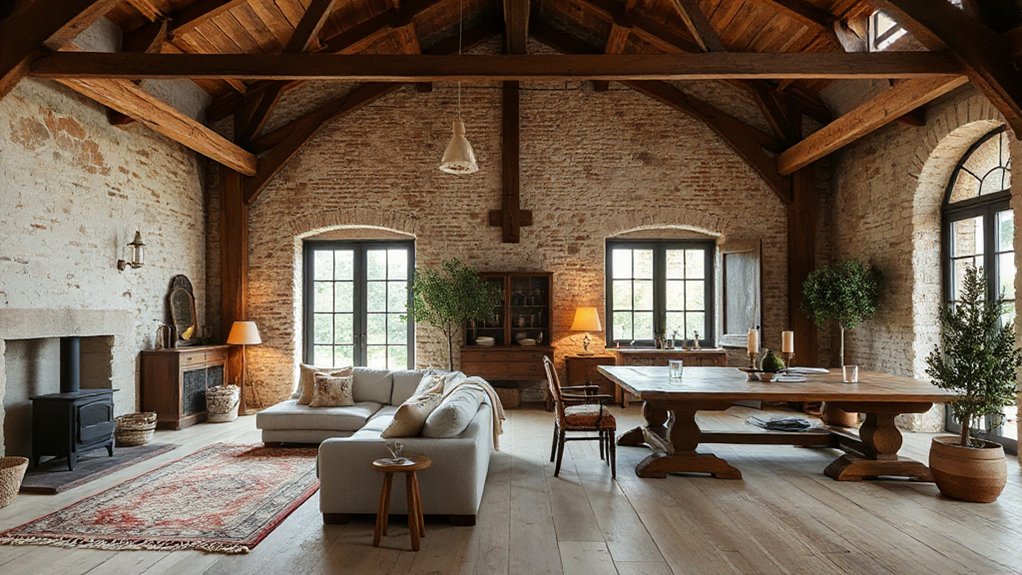
You can carve out cosy zones in your converted stone barn by grounding each area with a wool rug and layering warm, low-slung lighting that flatters the original masonry.
You’ll keep the volume intact when you float a sofa, set a farmhouse table, or angle a pair of chairs to define edges without putting up walls.
Choose timber, leather, and linen pieces with honest finishes so every “room” feels intentional yet still part of the barn’s open sweep.
Use Rugs And Lighting
To keep a converted stone barn feeling expansive yet liveable, let rugs and lighting do the zoning instead of new walls. Anchor each activity with statement rugs that respect the building’s age: hand-knotted wool, flatwoven kilims, or faded Vintage textiles that echo farm utility.
Size matters—go generous so edges don’t float on flagstone, and layer a smaller sheepskin where you want extra warmth underfoot.
Then sculpt the volume with light. Hang iron or patinated brass pendants low enough to humanise lofty trusses, and add wall-mounted lanterns to graze limewashed stone, revealing tool marks and mortar lines.
Use warm LEDs (2200–2700K) and dimmers so evening pools feel intimate while the roofline stays visually open. Keep glare off glazing with shaded lamps.
Define Areas With Furniture
Two well-placed furniture groupings can define a stone barn’s big volume more convincingly than any stud wall. Start with Furniture placement that respects original thresholds: align a sofa’s back parallel to a main aisle, so circulation still reads like the old cart run.
Pair it with two leather chairs and a low oak table; you’ve created a hearth-facing sitting bay without blocking sightlines to trusses and stonework.
For Zone definition at the dining end, turn the table perpendicular to the long wall and anchor it with a bench in honest timber. Use a tall dresser or open shelving as a permeable “gate,” not a barrier.
Keep pieces leggy and off the floor where possible, so light skims the flagstones and the barn stays airy.
Add Modern Comfort (Heat, Acoustics, Storage) Barn-True
Because a converted stone barn can feel as hard-edged as it looks, modern comfort has to arrive quietly—through radiant heat tucked beneath flagstone or wide boards, acoustic softening hidden behind wool-lined panels and heavy linen drapes, and storage built into joinery that reads like original farm cabinetry.
Add Modern insulation where you won’t disrupt the masonry: lime-compatible internal linings, insulated roof slopes, and airtight detailing behind reclaimed boards.
Control it with Smart thermostats, so the barn warms before you arrive yet never bakes the timbers.
Tame echo with rugs on oak, cork underlays, and book-lined alcoves that double as sound traps.
For storage, you’ll get the most by thickening walls into boot benches, pantry cupboards, and window-seat chests, using pegged frames, iron latches, and hand-rubbed oil finishes.
Frequently Asked Questions
Do I Need Planning Permission or Listed-Building Consent for Interior Changes?
You’ll often need consent if you alter structure, layout, or historic fabric; listed status usually triggers listed-building consent. For Barn lighting and furniture selection, stick to reversible fixings, protect stone, and confirm with your council early.
How Can I Damp-Proof a Stone Barn Without Trapping Moisture?
Like a wool coat in rain, you’ll stay dry by letting walls breathe. Skip impermeable Moisture barriers; use lime plaster, ventilated floors, and breathable paints. You’ll reduce rising damp—one survey showed 60% condensation drop.
What Flooring Works Best With Underfloor Heating in a Barn Conversion?
Choose dense stone flags, engineered oak, or tiled limecrete screeds; they’re ideal Flooring options for underfloor heating. You’ll get excellent heating compatibility, stable movement, and breathable build-ups. Avoid thick carpets and solid wide planks that cup.
How Do I Meet Building Regulations for Insulation and Ventilation in Stone Walls?
Like a wool coat on rugged stone, you’ll meet regs by using breathable insulation techniques—lime-based internal insulation, vapour-open boards, airtight taping—then add ventilation solutions: discreet trickle vents, MVHR, and moisture monitoring to protect heritage fabric.
What’s the Typical Cost Range for Converting and Furnishing a Stone Barn Interior?
You’ll typically spend $200–$500 per sq ft for a stone barn conversion and furnishing, depending on barn renovation scope. Historic preservation, reclaimed timber, lime plaster, bespoke joinery, and stone repairs push costs upward.
Conclusion
When you design your converted stone barn, you’ll get the best results by guarding what’s original, then building comfort around it. Let stone walls breathe, keep timber trusses honest, and choose lime plaster, reclaimed boards, and blackened steel for quiet contrast. Set clear sightlines and easy circulation, then layer warm light to lift the height and soften texture. Remember, measure twice, cut once—every detail should feel earned, calm, and enduring.