Nearly 70% of renovation budgets get eaten up by changes made mid-project, and most of that comes from unclear direction. You can avoid that by setting a single concept that matches how you actually live, then turning it into simple rules: must-haves, no-gos, and non-negotiable functions. You’ll use a tight mood board, a disciplined palette, and a material stack to keep every choice aligned—but the real shift happens when you apply it room by room, starting with…
Define Conceptual Interior Design in One Sentence

If you’re designing with intention rather than just decorating, conceptual interior design is the process of translating a clear idea—your goals, story, and functional needs—into a cohesive spatial plan that guides every choice in layout, materials, lighting, color, and furnishings.
In one sentence: you define a single, testable design concept, then you use it to align decisions so the finished space reads as one intentional system. You’ll articulate a central narrative, set performance priorities, and establish visual rules—proportions, adjacencies, and material relationships—that create Spatial harmony.
You’ll specify a palette and a repeatable set of cues, from Abstract motifs in textiles to consistent edge details in millwork, so every element reinforces the concept you approved. This keeps revisions focused and outcomes predictable.
Choose a Concept That Fits Your Real Life
You don’t choose a concept to impress a mood board—you choose one that supports how you actually move through your day. Map your routines first, then align the concept’s layout, storage, and materials to those patterns so the design works on repeat.
Prioritize function over fantasy, and you’ll end up with a space that looks intentional and performs effortlessly.
Match Concept To Routine
Although a concept can look flawless on a mood board, it only succeeds when it supports the way your household actually moves through the day. Track your patterns: where you drop keys, how you shift from work to dinner, when you need quiet, and which rooms carry the most traffic.
Then translate those routines into concept rules—material choices, sightlines, and zone priorities—so your space reinforces habits instead of fighting them.
Use Personal expression to anchor the concept in what you actually do: display collections where you naturally pause, choose colors that suit your daily energy, and edit decor that distracts.
Preserve aesthetic harmony by repeating one or two signatures (a finish, curve, or motif) across rooms, so every routine feels connected, not chaotic.
Prioritize Function Over Fantasy
A concept earns its place when it performs under real conditions—dirty shoes at the door, backpacks on the counter, video calls in the living room, and weekends that run loud.
Start by mapping your friction points: where clutter collects, where glare hits screens, where traffic jams happen, and what needs to stay within reach.
Then choose a concept that solves those realities before you chase fantasy aesthetics. If you love playful illusions—mirrors, mural perspectives, theatrical color—anchor them with durable flooring, wipeable paints, and lighting layers that flatter faces on camera.
Build storage into the concept: closed cabinets for noise control, drop zones by entries, and flexible seating that supports hosting and downtime.
When function leads, the concept stays believable—and livable.
Set Concept “Rules” (Must-Haves and No-Gos)
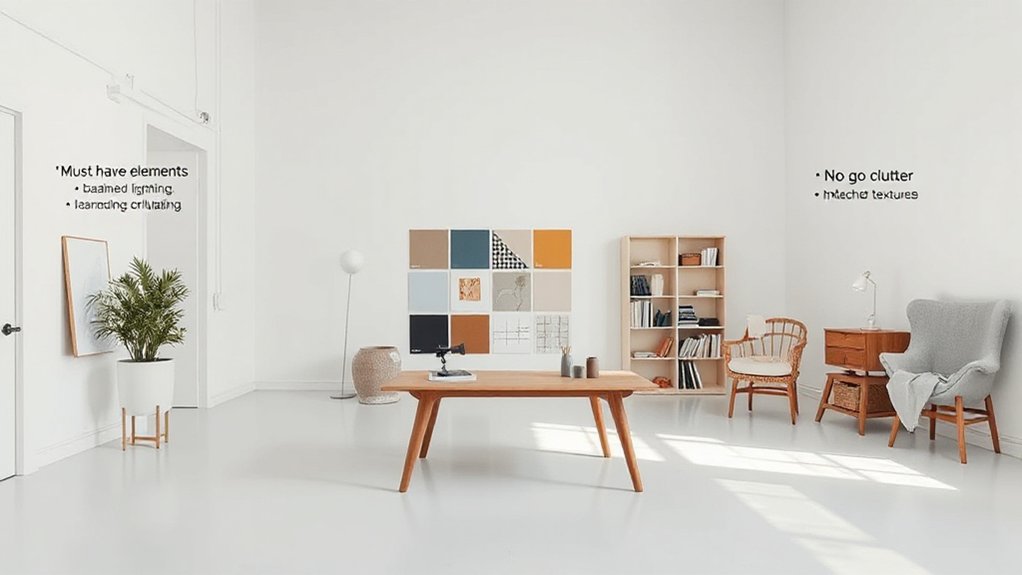
Before sketches turn into selections, lock in a short set of concept “rules” that guides every decision: must-haves that protect the story (key mood, anchor materials, essential functions, budget priorities) and no-gos that prevent drift (colors that break the palette, finishes that fight the era, furniture scales that disrupt circulation, anything that reads off-brand).
Write them like a checklist you can defend to any vendor.
Use color psychology to define what the space should make you feel—calm, energized, grounded—then name the limited hues that deliver it.
Define furniture placement principles: clear paths, sightlines to focal points, and seating that supports how you actually gather.
Add measurable constraints (min walkway widths, max rug sizes, target price bands) so every choice stays aligned.
Find Inspiration Without Getting Overwhelmed
You’ll keep inspiration productive by starting with one clear mood that supports how you want the space to feel and function.
Pull cues from simple, reliable sources—one artwork, a fabric swatch, a travel photo—so every reference stays measurable and easy to translate into finishes and forms.
Then you’ll use your must-haves and no-gos to cut the noise, limit options fast, and keep the concept consistent from first pin to final selection.
Start With One Mood
When inspiration starts coming from everywhere at once, it’s easy to lose the thread of what you actually want your space to feel like. Start by choosing one mood—calm, energized, grounded, or romantic—and treat it as your project brief. Name three adjectives that define it, then decide how you’ll measure success: quieter evenings, better focus, smoother hosting.
Use Color psychology to support the mood: muted blues for calm, warm terracottas for sociability, soft neutrals for clarity.
Next, test the mood against Spatial flow. Map how you move, pause, and gather, and remove layouts that fight the feeling.
Keep every decision—materials, lighting temperature, texture—aligned with that single emotional target. You’ll stay decisive, and your space will read intentional.
Use Simple Inspiration Sources
Three simple inspiration sources keep your concept clear without turning research into noise: one reference room you already love, one material cue (a tile, fabric, or wood tone), and one lifestyle image that reflects how you want to live in the space. Save each in one folder and write a one-line takeaway: what you’re borrowing and why it supports the mood you chose.
Use the room image to set proportion and furniture arrangement—note sightlines, circulation paths, and where the focal point sits. Use the material cue to lock in texture, sheen, and maintenance expectations for your daily routine. Use the lifestyle image to test function: hosting, working, resting, or storage needs.
Then apply Color psychology to confirm the emotional temperature before you collect anything else.
Limit Options With Rules
Once you’ve saved your three anchors (a reference room, a material cue, and a lifestyle image), protect the concept by setting a few hard rules that shrink every decision into a clear yes/no.
Lock a palette using Color theory: choose one dominant neutral, one supporting tone, and one accent with a defined saturation range. Set finish limits (for example: two woods, one metal, zero high-gloss), and cap patterns to one scale per room.
Then write layout rules that guide furniture placement: maintain a 36-inch circulation path, keep major seating within conversation distance, and align key pieces to one visual axis.
When you shop or sketch, anything breaking a rule gets cut fast. You’ll present fewer, stronger options, and your client feels confident, not buried.
Build a Mood Board That Stays Cohesive
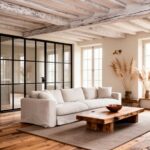
Although your concept might start as a single word—calm, bold, nostalgic—it won’t read clearly in the final space unless you translate it into a cohesive mood board. Start by choosing one “hero” reference image that captures the mood, then add only supporting visuals that reinforce it—forms, lighting direction, furniture silhouettes, and spatial rhythm.
Keep every addition accountable: if it doesn’t clarify the story you’ll present to your client, cut it.
Organize your board into clear lanes: inspiration, key shapes, and sensory cues. Test Color harmony by viewing everything in grayscale first, then in full color, ensuring the overall value range stays consistent.
Check Texture balance by pairing rough/smooth and matte/gloss so the mix feels intentional, not random. Review it with fresh eyes and revise.
Create a Color Palette and Material Stack
When your mood board feels locked in, you can translate that story into a disciplined color palette and material stack that you’ll specify, source, and defend in client meetings. Start with one dominant hue, one supporting tone, and one accent, then set two neutrals to control value shifts and guarantee Color harmony across finishes. Assign each color a job: warmth, depth, focus, or calm.
Next, build a material stack with three tiers: primary surfaces, secondary planes, and touchpoints. Balance Material contrast by pairing matte with sheen, tight grain with open veining, and soft textiles with crisp metals. Document sources, lead times, and alternates, then create a one-page spec card that explains the concept, performance needs, and budget logic without overpromising.
Apply the Concept Room by Room (Layout to Décor)
Your color palette and material stack set the rules; now you’ll apply them room by room so the concept reads consistently from the floor plan to the final styling layer.
Start with function: define sightlines, circulation, and focal points, then lock Furniture placement to support how you live, host, and work.
In living areas, scale seating to the rug and conversation radius; repeat one key material in tables or shelving to cue continuity.
In kitchens and baths, echo finishes through hardware and plumbing, but vary texture to avoid monotony.
Use Lighting techniques as your narrative tool: layer ambient, task, and accent, and aim beams toward art, millwork, or stone.
Finish with décor that follows the concept’s shapes, not trends.
Frequently Asked Questions
How Much Does a Conceptual Interior Design Project Typically Cost?
You’ll typically pay $2,000–$15,000+ for a conceptual interior design project, depending on scope and deliverables. You’ll sharpen Budget planning, guide Material sourcing, and align layouts, palettes, and narrative details with your goals.
Should I Hire an Interior Designer or Can I DIY Effectively?
You can DIY effectively if you’ve got time, a clear concept, and discipline, but DIY pitfalls add up fast. Hire a designer when you need Designer benefits: cohesive vision, specs, sourcing, and risk control.
How Long Does It Take to Complete a Concept-Driven Redesign?
It typically takes 6–14 weeks—ready to align your vision? You’ll spend 1–2 weeks defining goals, 2–4 refining Color palettes, 2–3 finalizing Furniture placement, plus 1–5 sourcing, ordering, and installation.
What Are Common Mistakes to Avoid When Executing a Design Concept?
You’ll avoid common mistakes by skipping vague briefs, ignoring Color coordination, and neglecting Space optimization. You should test lighting, scale, and materials early, stick to a clear narrative, and align every decision with your client’s priorities.
How Do I Incorporate Existing Furniture Without Breaking the Concept?
Like threading old pearls into a new necklace, you keep existing pieces by curating Furniture placement and enforcing Style consistency. You edit finishes, reupholster selectively, and anchor with one unifying palette so everything reads intentional.
Conclusion
You’ve now got more than pretty ideas—you’ve built a North Star. When you choose a concept that fits your real routines, set clear must-haves and no-gos, and translate inspiration into a tight mood board, your home starts telling one calm, confident story. Your palette, materials, and lighting become brushstrokes, not noise. Apply your rules room by room, and every choice clicks into place—functional, personal, and timeless.