You can turn an attic into a bright master suite without major compromises, but only if the structure and code requirements truly pencil out. Start by verifying headroom, stair clearances, and a layout that fits a real bed and bath. Then plan daylight with dormers or skylights while keeping egress windows compliant. If you don’t reinforce framing and seal and insulate every plane, comfort and permits can stall—so your next decision matters.
Confirm Your Attic Can Be a Master Suite
Before you design anything, verify your attic meets the minimum structural and code requirements for a habitable master suite: measure clear headroom (typically 7 ft over a required floor area), confirm the floor framing can support sleeping-room live loads, and check that you can provide compliant stairs, emergency egress (window or door), insulation/ventilation, and HVAC capacity.
Next, document existing rafters, joist sizes, spans, and bearing points, then compare them to your local amendments and engineered tables. If joists are undersized, you’ll need structural reinforcement such as sistering, LVLs, or a new beam line that lands on supported walls below.
Verify roof framing can accept any new openings without overstress. Specify attic insulation to meet required R-values, maintain ventilation paths, and control condensation.
Pull permits early and schedule inspections.
Plan Bed, Bath, Stairs, and Headroom Zones
Once you’ve confirmed the attic can legally and safely become living space, lay out the master suite by mapping where full-height standing room, circulation, and required clearances actually exist. Snap chalk lines for the 7‑ft headroom plane and keep the bed and primary walk paths inside it. Push dressers and built-ins into low-slope edges.
Place the bath where you can stack plumbing over existing wet walls; reserve a 30‑in by 60‑in clear floor at fixtures and a 36‑in path where possible. Align the stair to land in a full-height zone, maintain code-required width, headroom, and guarded openings.
Coordinate Attic insulation thickness with rafter depth so you don’t steal headroom, and verify roofing materials won’t require structural changes that shift your layout.
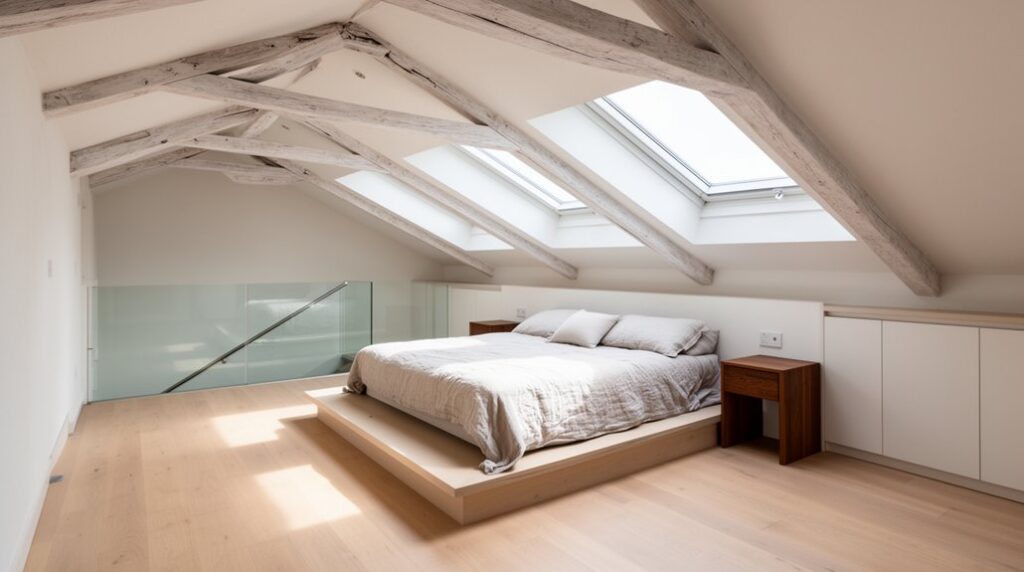
Add Dormers or Skylights to Brighten the Attic Suite
You can boost daylight and usable wall height by adding dormers, but you’ll need to size them for roof loads, match the existing pitch, and maintain required setbacks, headroom, and egress where applicable.
If you choose skylights, you should place them between rafters to minimize structural changes, align them with the bed and bath zones, and meet tempered-glass, flashing, and insulation requirements.
In both cases, you’ll control heat gain and privacy with orientation, shading, and moisture-managed air sealing around each opening.
Dormer Design Considerations
Because attic master suites often sit under low rooflines, dormers and skylights can deliver code-compliant headroom, daylight, and ventilation without wasting floor area. When you choose dormers, match the home’s massing and window proportions for historic preservation, and confirm exterior changes meet local review rules.
Size the dormer to maintain required ceiling heights along primary circulation, not just at the window, and verify stair and egress paths remain compliant. Keep structural loads clear: you’ll likely add headers, double rafters, and tie-ins that preserve roof diaphragm continuity.
Detail air and water control layers with step flashing, ice-and-water shield, and continuous insulation to prevent leaks and condensation. Specify eco-friendly materials for trim and insulation, and design built-ins under the dormer knees for storage.
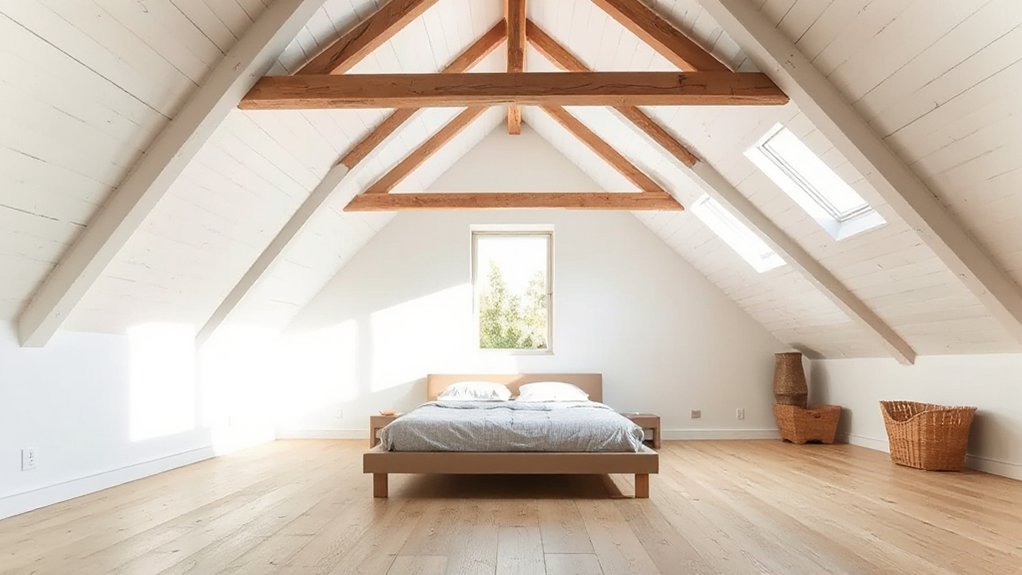
Skylight Placement Strategies
While a well-placed skylight can outperform a dormer for daylight without changing the roofline, its location has to satisfy headroom, egress, and moisture-control requirements.
Center units over the circulation zone, not the bed, so you keep the 7‑ft minimum ceiling height where you’ll stand. Maintain required emergency-escape dimensions at any operable roof window, and don’t place glazing where snow sliding can block opening.
Set skylights between rafters to limit framing changes; if you must cut, install doubled headers per span tables. Use high-SHGC on north light only if overheating isn’t a risk, and specify tempered/laminated skylight materials.
Extend attic insulation tight to the rough opening, add a continuous air seal, and flash with an ice-and-water membrane plus step flashing at shingles.
Choose Attic Master Suite Windows for Egress
For your attic master suite, you’ll need at least one code-compliant egress window that meets minimum net clear opening, minimum opening height/width, and maximum sill height requirements.
Place it where you can reach it without climbing over furniture, and keep the clear path to the opening unobstructed for fast escape.
Size and locate the unit to fit between or properly header existing rafters while still meeting the required clear opening when the sash is fully open.
Egress Window Code Basics
How do you know if an attic master suite window qualifies as egress? You confirm it meets IRC/IBC emergency escape and rescue opening rules and your local amendments.
For fire safety, you’ll need an operable unit (not fixed) that opens from the inside without keys, tools, or special knowledge, and it can’t require removal of sashes or screens.
Verify the clear opening size meets the minimum net clear area and minimum clear height and width, measured with the window fully open.
Check sill height limits from the finished floor, since high sills can void compliance or trigger a required step.
Pull building permits early and keep the manufacturer’s egress specs for inspections.
Always verify requirements with your AHJ.
Optimal Placement And Sizing
Because attic geometry can shrink your net clear opening fast, you’ll get the most reliable egress by placing the window where the finished-floor-to-sill height stays within code and the roof pitch doesn’t choke the clear width or height when fully opened.
Center it in a dormer wall or a gable end when possible, since vertical walls preserve full sash travel and meet minimum clear opening area without oversized units.
Size the unit by net-clear dimensions, not rough opening; confirm the manufacturer’s egress chart for your specific operation.
Keep the sill low enough to comply, but don’t sacrifice ceiling height at the head—maintain required headroom along the escape path.
Place glazing to maximize natural light while keeping the landing outside clear, reachable, and free of screens or fixed grilles.
Reinforce the Attic Floor and Rafters

Before you add finishes or move in furniture, you’ll need to verify that the attic floor joists and roof rafters can carry the new master suite loads and meet local code. Confirm design live/dead loads, spans, species, grade, and existing notches or holes, then document what you find.
If joists are undersized, add structural reinforcement by sistering full-length members, installing LVLs, or adding a beam and posts to bearing walls or new footings. Tie connections with rated hangers, straps, and proper fasteners, and maintain required bearing lengths.
For rafters, reinforce at ridge, hips, and dormer openings; add collar ties or rafter ties where required, and don’t cut members without engineered headers. Coordinate chases so attic insulation won’t force compromised framing later.
Insulate and Air-Seal the Attic Master Suite
Once the framing checks out, insulate and air-seal the attic master suite as a single system so you hit code-required R-values, control moisture, and stop heat loss at the same time.
Start by defining the thermal boundary at the roofline or the attic floor, then keep it continuous across slopes, knees, and dormer cheeks.
Install baffles where needed to protect insulation from wind-washing, and block soffit chases with solid backing.
Use spray foam or caulk at top plates, penetrations, and sheathing seams, and add gaskets behind electrical boxes for air sealing.
Fit batts or cut-and-cobble rigid foam tight, avoid compression, and cover exposed foam with a code-approved ignition barrier.
Seal the access hatch.
Ventilate and Condition the Attic Master Suite
Even with a tight, well-insulated roof assembly, you still need controlled ventilation and a reliable conditioning plan so the new master suite stays dry, comfortable, and code-compliant year-round.
Choose ventilation strategies that match your roof: a vented assembly needs continuous soffit-to-ridge airflow with baffles that preserve attic insulation depth; an unvented assembly needs sealed foam or rigid insulation and no ridge vent openings.
For indoor air quality, install a quiet, ducted bath fan vented outdoors, sized per code, and use a timer or humidity sensor.
Condition the space with a dedicated supply and return or a ductless mini-split; don’t rely on leakage from lower floors.
Seal duct penetrations, insulate ducts in unconditioned runs, and verify airflow with commissioning tests.
Design Built-In Storage for Attic Eaves
Where can you reclaim the most square footage in an attic master suite without changing the roofline? In the eaves. Build low knee‑wall cabinets or drawers that track the rafter pitch, and keep a clear, code‑compliant path of travel to the door and any required egress window.
Frame the storage chase so it doesn’t compress attic insulation; maintain required R‑value and continuous air sealing at the sloped roof and knee wall. Add an insulated, gasketed access panel for service and inspection, and protect wiring with nail plates where it passes through studs.
Use full‑extension slides, shallow shelves, and labeled zones for seasonal bins, linens, and shoes. Finish interiors with durable, cleanable panels for long‑lasting storage solutions.
Frequently Asked Questions
How Much Does an Attic-To-Master-Suite Conversion Typically Cost?
You’ll typically spend $80,000–$200,000, depending on structural changes, permits, and finishes. Plan for insulation upgrades, Interior lighting, HVAC, plumbing, egress windows, stairs, and code-required fire separation to keep space efficient.
Do I Need an Architect, or Can a Contractor Handle the Design?
You can use a contractor for design-build, but you’ll want an architect when structure, egress, or permits complicate things. Like a ship’s chart, plan Interior lighting and Storage solutions, code-tight, space-efficient.
How Long Does a Typical Attic Master Suite Renovation Take?
You’ll typically finish an attic master suite renovation in 8–12 weeks, depending on permits, framing, and inspections. You’ll save time by preselecting insulation materials and ventilation options, coordinating trades, and avoiding rework.
What Permits Are Required for Converting an Attic Into Living Space?
You’ll typically need building, electrical, plumbing, and mechanical permits, plus structural or dormer approvals and sometimes zoning review. You must meet Building codes, insulation requirements, egress, smoke/CO alarms, and energy compliance inspections throughout.
Will Converting the Attic Into a Suite Increase My Home’s Resale Value?
Yes, you’ll likely boost resale value as buyers picture a calm retreat under the eaves. You’ll maximize ROI by installing attic insulation, verifying ceiling reinforcements, meeting egress, HVAC, and fire code, and documenting permits.
Conclusion
You’re turning a dusty attic into a lantern-lit retreat, but it only shines if the bones are sound. Confirm structure, headroom, stairs, and a code-compliant egress window. Reinforce joists and rafters, then air-seal and insulate so heat doesn’t leak like smoke. Add dormers or skylights to pull daylight through the roofline. Ventilate and condition the suite for comfort year-round. Finish with built-ins in the eaves—your hidden compartments of calm.