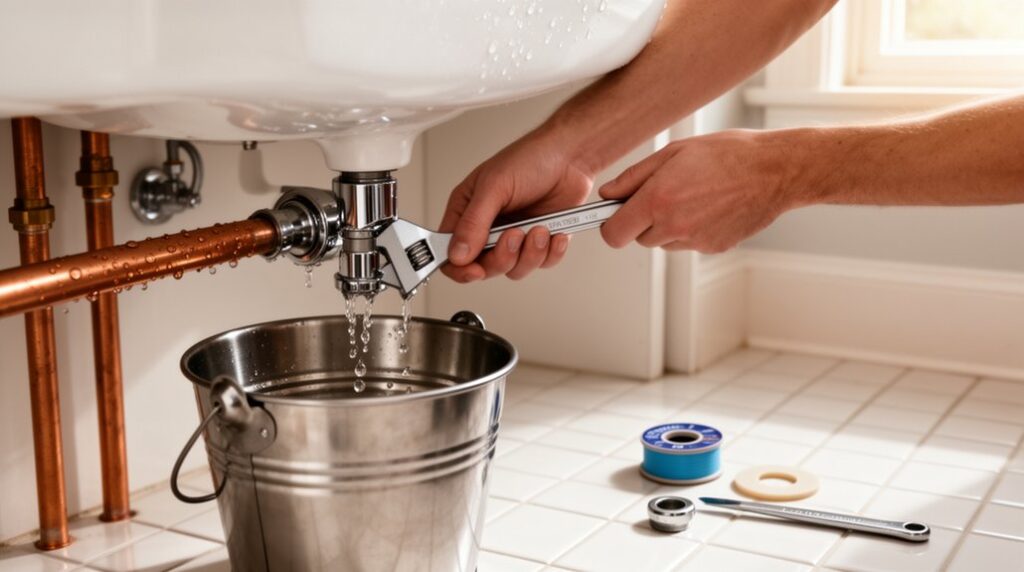
You can’t fix a leak until you confirm whether it’s coming from a faucet, a supply line, or a threaded pipe joint. Start by shutting off the main water valve, relieving pressure at the nearest fixture, and keeping electrical items dry and de-energized. Set out an adjustable wrench, screwdrivers, PTFE tape, and a flashlight, then check for dripping, corrosion, or a damp cabinet floor. Next, you’ll isolate the exact failure point and choose the right repair.
Find the Leak: Faucet or Pipe?
Before you grab tools, pinpoint whether the water’s coming from the faucet body or the supply/drain piping. Dry the area with a clean rag, then wrap suspected joints with paper towel to reveal fresh wetting. Use a flashlight and mirror to inspect under the escutcheon, around the valve stem, and at compression nuts.
For Leak detection methods, add a few drops of food coloring to standing water in the basin; track where color appears below.
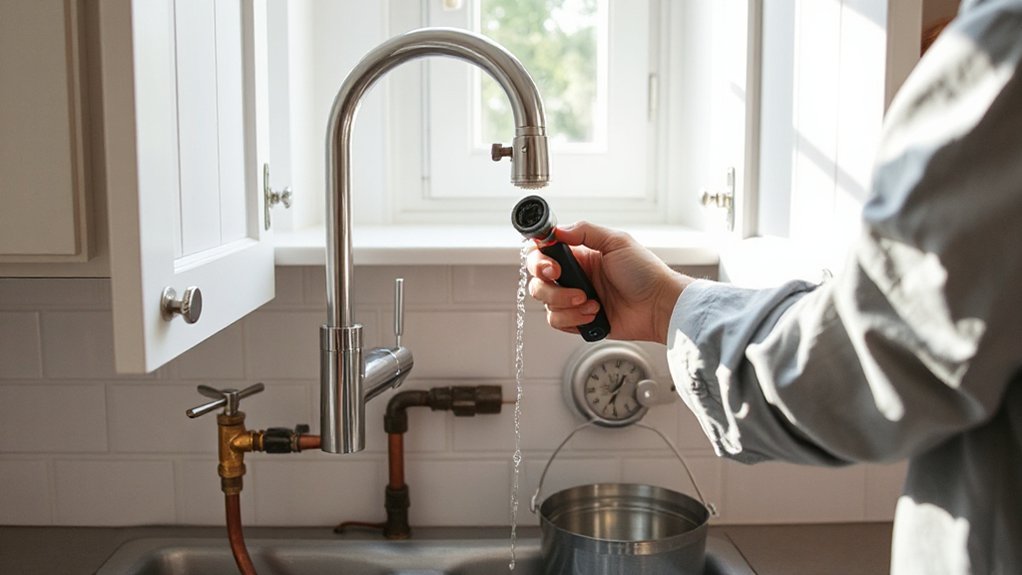
Perform water flow analysis by running cold, then hot, then mixed water, watching for leaks that change with temperature or pressure. If dripping stops when the spout’s off, suspect supply-side seepage; if it continues, suspect the faucet cartridge or drain assembly.
Document findings.
Shut Off Water and Stay Safe
Before you put a wrench on anything, you’ll shut off the water at the main shutoff valve (typically near the meter or where the service line enters) and confirm flow stops at a nearby fixture.
Then you’ll relieve line pressure safely by opening the lowest cold faucet and a higher fixture to vent, keeping a bucket and towels ready.
If the valve won’t fully close or you see corrosion or leakage at the shutoff, you’ll stop and call a licensed plumber to stay code-compliant and avoid damage.
Locate Main Shutoff Valve
In most homes, you can stop leak damage fast by finding and shutting off the main water shutoff valve as soon as you spot a problem. Know your Main shutoff and confirm Valve location before you start any repair, per basic plumbing safety practice.
Look for the valve where the water service enters the building: at the perimeter wall, in a crawlspace, basement, garage, or a utility/mechanical room near the water meter. In warmer climates, check an exterior meter box by the sidewalk.
Use a flashlight, gloves, and a clear path; keep the area dry to reduce slip and shock risk. Identify the handle type: a round wheel (gate/globe) turns clockwise to close, while a lever (ball valve) rotates 90° to perpendicular. Label it.
Relieve Line Pressure Safely
Once you’ve shut the main valve, relieve trapped line pressure so fittings don’t spray when you open the system. Open the highest faucet in the building first, then the lowest (often a basement laundry sink or hose bibb) to drain the line. Flush toilets once to empty tanks and reduce backpressure.
If you’re on a water heater circuit, shut the gas control to “Pilot” or switch off the breaker, then open a hot tap to prevent vacuum lock. Use a bucket and adjustable wrench only after you’ve confirmed no flow.
Keep the work area dry, wear safety glasses, and use gloves—these safety precautions prevent burns and cuts. This pressure release step protects valves, stops surprises, and keeps repairs controlled.
Grab Tools for Fixing Leaky Faucets and Pipes
Because a small leak can turn into a soaked cabinet fast, grab the right tools and safety gear before you loosen anything. Set a bucket, towels, and a drip pan under the work. Wear safety glasses and cut-resistant gloves, and keep a flashlight or headlamp on you.
Use an adjustable wrench, slip-joint pliers, and a basin wrench for tight sink nuts. Add a screwdriver set, hex keys, a utility knife, and a putty knife. Protect finishes with a strap wrench or jaw pads.
For threaded joints, keep PTFE tape and pipe dope rated for potable water. Have a tubing cutter, emery cloth, and a small wire brush for prep.
Practice tool maintenance and follow safety precautions: inspect jaws, replace worn tools, and store everything dry.
Fix a Leaky Faucet: Washers, O-Rings, Cartridges
Shut off the hot and cold stop valves, plug the drain, and identify your faucet type (compression, ball, cartridge, or ceramic-disc) before you put a screwdriver or hex key on the handle.
On compression faucets, you’ll pull the stem with an adjustable wrench and replace the rubber washer and any O-rings, using plumber’s grease rated for potable water.
On cartridge-style faucets, you’ll remove the retaining clip, slide out the cartridge with slip-joint pliers, and install a matching new cartridge to stop the leak.
Identify Faucet Type
Before you replace a washer, O-ring, or cartridge, you’ve got to identify what type of faucet you’re working on, since each design seals water differently and requires different parts and tools. Start by shutting off the stop valves and verifying flow is off at the spout; keep a towel and a parts tray ready.
Determine the Faucet style: compression, ball, cartridge, or ceramic-disc. Check the Handle mechanism—does it turn several full rotations (compression) or move 90–180 degrees (cartridge/disc/ball)?
Look for a set screw under a cap, then use the correct hex key or screwdriver to remove the handle without stripping fasteners. Note stem shape, retaining nut type, and any brand markings.
Photograph each layer so you can match parts accurately and reassemble to manufacturer specs.
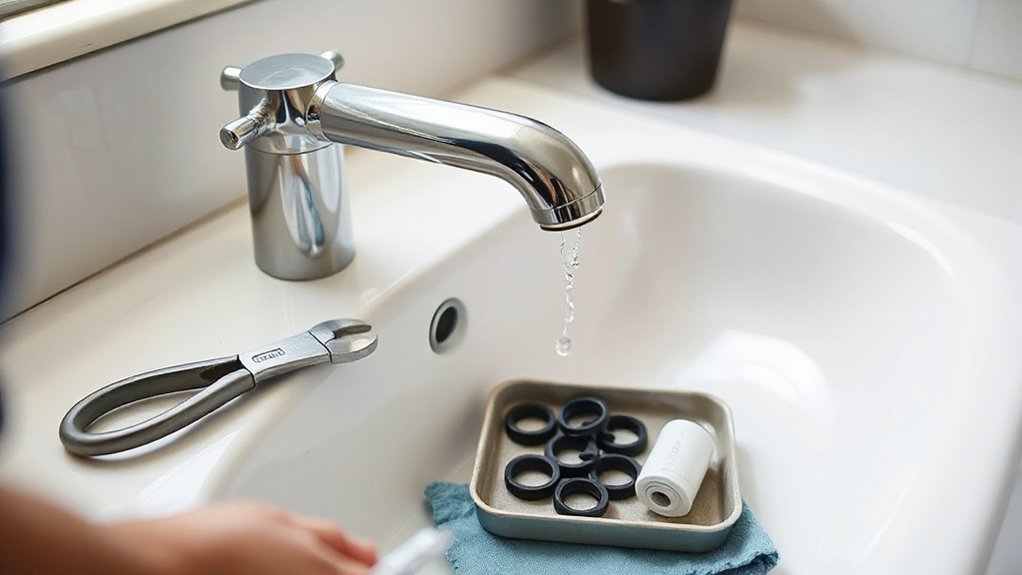
Replace Washers And O-Rings
Now that you’ve identified the faucet type and exposed the stem or cartridge, replace the wear parts that actually seal the water path—washers and O-rings.
Shut off the stop valves and verify isolation by cracking the handle; relieve pressure before loosening fasteners.
Use a correctly sized screwdriver or nut driver to remove the retainer screw and lift off the rubber washer.
Match the new washer by diameter and thickness for code-compliant shutoff performance; clean the seat with a nylon brush, not a metal pick, to avoid scoring.
For O-ring installation, pull the old O-ring with a plastic hook, wipe the groove, then lubricate the new ring with silicone plumber’s grease only.
Reassemble and snug hardware to manufacturer torque—don’t overtighten.
Restore water and check for drips.
Install New Cartridge
If the faucet still drips after you’ve replaced washers and O-rings, install a new cartridge to restore the internal seals and shutoff.
Start with leak diagnosis: confirm the drip comes from the spout, not the handle or supply lines. Shut off the stop valves, open the faucet to relieve pressure, and cover the drain.
Use a hex key or screwdriver to remove the handle, then pull the trim and retaining clip or bonnet nut with an adjustable wrench. Note cartridge orientation, then extract it with a cartridge puller to avoid damaging the valve body.
Match the model exactly, lubricate O-rings with plumber’s silicone grease, and complete cartridge installation fully seated. Reinstall the clip, torque the bonnet snug (don’t over-tighten), restore water, and test for leaks and smooth operation.
Fix a Leaky Pipe Joint With Plumber’s Tape
Although a small drip at a threaded pipe joint can look minor, it often means the threads aren’t sealing correctly, and plumber’s tape (PTFE/Teflon tape) can restore that seal when the joint isn’t cracked or corroded.
Start with leak detection: dry the fitting, watch for beads, and confirm the leak is at the threads, not the pipe wall. Shut off the supply, relieve pressure, and place a bucket.
Use two wrenches to avoid twisting the pipe, then loosen the joint. Clean male threads with a rag and nylon brush.
Wrap PTFE tape clockwise (same direction you’ll tighten) 3–5 wraps, keeping tape back from the first thread. Reassemble hand-tight, then snug 1–2 turns.
Restore water, check for drips, and reinstall pipe insulation if removed.
Patch Small Pipe Leaks With Clamps or Epoxy
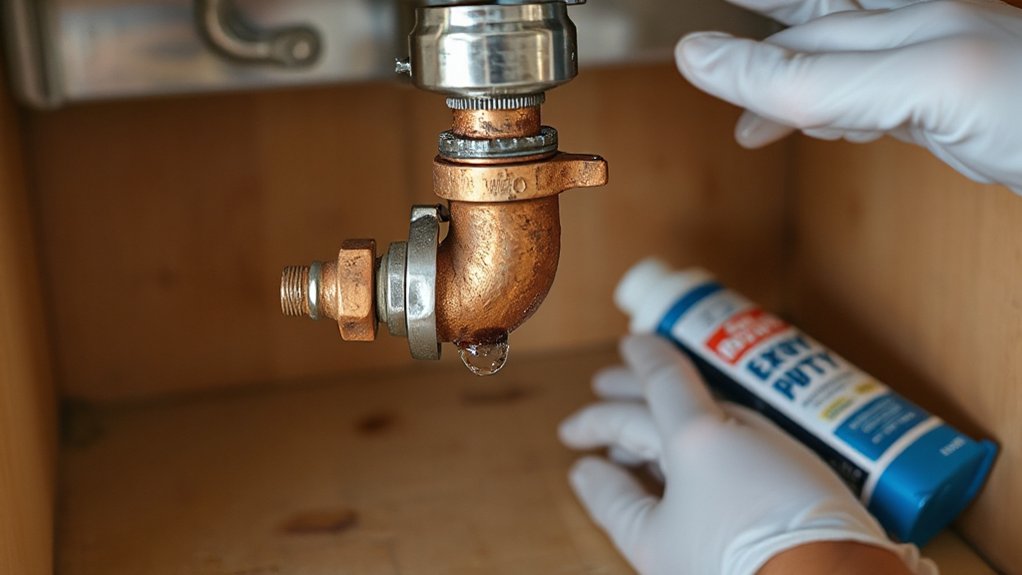
When a pinhole or hairline crack starts spraying or weeping from the pipe wall (not a threaded joint), you can stop it fast with a listed repair clamp or a two-part epoxy made for potable-water lines.
Shut off the water, open a nearby faucet to depressurize, and dry the pipe.
For a clamp, clean to bare metal/PVC, center the gasket over the defect, and torque the screws evenly to the manufacturer’s spec—don’t overtighten.
For epoxy, scuff with emery cloth, mix per label, and wrap the putty fully around the pipe, extending past the leak; hold until it sets, then cure before repressurizing.
Restore Pipe insulation after the repair for Leak prevention, and monitor for 24 hours.
Stop Leaks Under Sinks and Supply Lines
Before you start tightening anything under the sink, shut off the hot and cold stop valves. Open the faucet to relieve pressure, and place a towel or pan under the trap so you can see exactly where water tracks.
Use a headlamp and adjustable wrench, but don’t over-torque: snug compression nuts 1/8–1/4 turn.
If a braided supply hose weeps at the stop valve or faucet shank, hold the opposing fitting with a second wrench to prevent twisting the copper stub-out.
Replace cracked ferrules, crushed washers, or corroded hoses; use listed, code-approved stainless braided connectors sized to the valve (typically 3/8-in.) and fixture (1/2-in. IPS).
Apply PTFE tape only on tapered male threads, never on compression joints.
Tight joints support Water conservation and Leak prevention.
Test Your Repair and Check for Hidden Leaks
After you’ve snugged fittings or swapped parts, restore water pressure in a controlled way and verify every joint under real flow. Open the shutoff valve slowly to avoid water hammer, then run the faucet both hot and cold for two minutes.
Use a bright flashlight and a dry paper towel to wipe compression nuts, ferrules, P-trap joints, and supply hoses; any dampness signals active seepage. Check slip-joint nuts for proper hand-tight plus a quarter-turn with tongue-and-groove pliers—don’t over-torque plastic.
For leak detection, place a drip pan or dry cardboard under connections and recheck after 15 minutes. Inspect cabinet floors, wall penetrations, and escutcheons for staining or odor that suggests hidden issues.
Tighten, re-seat, or reapply PTFE tape as needed, then retest.
Call a Plumber When Leaks Get Serious
How do you know a leak has crossed into “call-a-pro” territory? If you’ve shut the fixture stops and the main shutoff, yet water still moves, you may have a failed valve, slab leak, or cross-connection that needs licensed diagnosis.
Call if you see ceiling sag, bubbling paint, moldy odors, or hear constant pipe noise. Call immediately for any gas smell near a water heater.
For safety, de-energize nearby circuits at the breaker, then use a non-contact voltage tester before touching wet areas. Don’t open walls without confirming shutoffs and pressure relief.
Keep Emergency preparedness: know shutoff locations, store caps, and keep an adjustable wrench and channel-lock pliers. A plumber can pressure-test, camera-inspect, and implement code-compliant Leak prevention repairs.
Frequently Asked Questions
What Causes Water Hammer Noises After Fixing a Leak?
You’re hearing water hammer because the repair changed flow and trapped air, letting pressure spikes slam pipes. Shut water, bleed lines, recharge air chambers, and install shock valves; use a wrench, wear eye protection, check local code.
Will Hard Water Shorten the Life of Faucet Repair Parts?
Yes—hard water can shorten repair-part life: it abrades, it clogs, it stiffens. Mineral buildup wears washers, O-rings, cartridges. Use a torque-limited wrench, shut off supply, flush lines, apply silicone grease, replace parts.
Are DIY Pipe Repairs Covered by Homeowners Insurance?
Usually, you’re not covered for DIY pipe repairs; you’re covered for sudden water damage if you document it for Insurance claims. Check coverage exclusions, use a pipe wrench, shutoff valve, and test fittings.
How Much Can a Small Leak Increase My Monthly Water Bill?
A small leak can raise your monthly bill $5–$60+ depending on flow. You’ll confirm via leak detection: read the meter, isolate fixtures, and repair to code. You’re supporting water conservation and preventing damage.
What Maintenance Schedule Helps Prevent Future Faucet and Pipe Leaks?
Coincidentally, you’ll prevent leaks by scheduling monthly preventative inspections and seasonal maintenance: winterize lines, check shutoffs, tighten fittings. Use an adjustable wrench, PTFE tape. Shut off water, relieve pressure, wear gloves, follow local code.
Conclusion
Once you’ve found the leak, you’ve done the hard part. Shut off the supply, lock out power near water, and suit up with gloves and eye protection. Use the right wrench, replace worn washers/O-rings or cartridges, and wrap clean threads with PTFE tape before tightening. Patch small cracks with a rated clamp or epoxy, then restore pressure and test. Don’t cut corners—an ounce of prevention is worth a pound of cure.