If you’re considering a parallel (galley) kitchen, you’ll get two efficient runs of cabinets and appliances with a central aisle that can either streamline your routine or feel tight. You’ll need to confirm clearances, map your sink-cooktop-fridge triangle, and decide whether an open end or a door makes more sense for traffic. The right storage and lighting choices can make or break it, and a few small missteps can cost you…
What Is a Parallel Kitchen Design (Galley)?
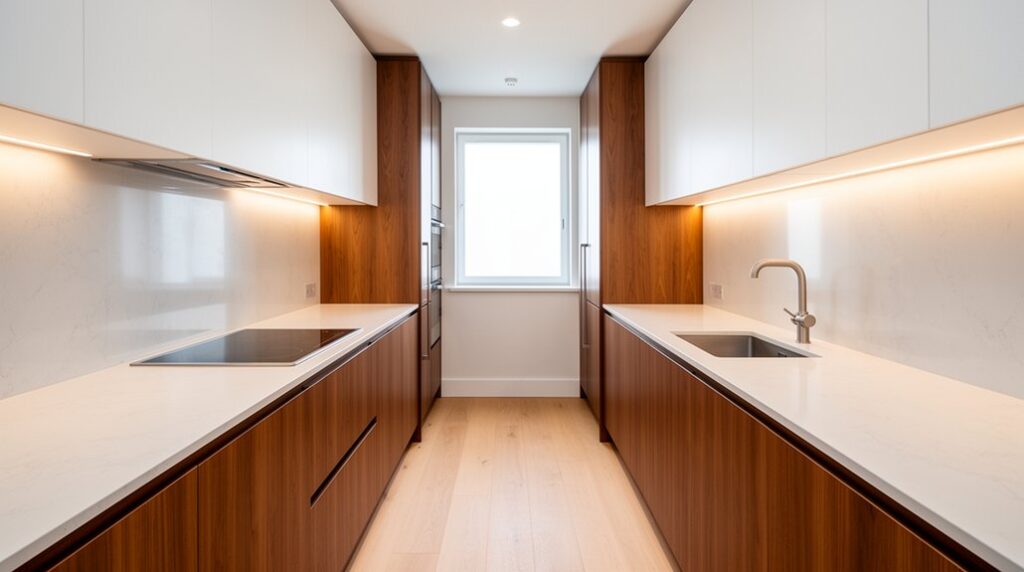
If you’ve ever cooked in a narrow space and wished everything was within easy reach, you’ve already experienced the logic behind a parallel (galley) kitchen design. You set two straight runs of cabinetry and appliances facing each other, creating a central work aisle that keeps prep, cooking, and cleanup in a tight sequence.
You typically place the sink and dishwasher on one side and the cooktop and ovens on the other, so you can pivot instead of crossing the room. You’ll also gain continuous counters for staging and serving.
To make it feel cohesive, you’ll plan Color schemes that unify both runs and reduce visual clutter. Smart Material choices—durable counters, easy-clean backsplash, consistent cabinet finishes—support heavy daily use and simplify maintenance.
Parallel Kitchen Dimensions That Feel Comfortable
To make a parallel kitchen feel comfortable, you’ll start by setting an aisle width that lets you pass, open doors, and work without bumping into the opposite run.
You’ll also confirm counter depth and clearances so appliances, drawers, and walk space all function at the same time.
Finally, you’ll space your work zones—prep, cook, and clean—so the steps between them stay short and traffic doesn’t cut through your workflow.
Ideal Aisle Widths
How wide should the aisle be in a parallel kitchen so it doesn’t feel tight every time you cook? Aim for about 42 inches if one cook uses the space, and 48 inches if you often work side by side or need to pass someone carrying hot pans.
Keep that clear path consistent from entry to sink to cook zone, so you don’t bottleneck during prep. Plan appliance placement so open dishwasher, oven, or fridge doors don’t collide or block the aisle; if they would, prioritize a wider aisle or change the hinge/swing.
Also, use color schemes to influence perceived width: lighter, continuous finishes and strong, even lighting make the aisle feel more open without changing the footprint. Match widths to your daily routine.
Counter Depth And Clearance
Because your counters set the “working envelope” of a parallel kitchen, their depth and the clearance around them determine whether the aisle stays usable once stools, handles, and appliance doors enter the picture. Standard 24-inch-deep base cabinets work well, but you’ll want to confirm countertop overhangs, pulls, and towel bars don’t steal passage space.
If you add seating, plan for knee space and keep stools from projecting into the aisle when not in use. With appliance placement, check door swing and handle depth for refrigerators, dishwashers, and wall ovens so doors can open without blocking circulation.
Leave breathing room at end panels and tall units for turning. Color coordination helps, too: matching counter thickness and edge profiles keeps the run visually tight and calm.
Work Zone Spacing
Where a parallel kitchen really earns its keep is in the spacing between key work zones—sink, cooktop, fridge, and prep—so you can pivot, open doors, and pass someone without breaking your workflow.
Aim for 42–48 inches between runs for one cook; 48–60 inches if two people work together.
Keep the sink and cooktop on one run with 24–36 inches of landing space on each side, and place prep between them when possible.
For Appliance placement, don’t face a dishwasher or oven directly into another open door; stagger them or shift the fridge to an end.
Your Color schemes can help: use darker lowers on the “work” wall and lighter uppers opposite to visually widen the aisle and reduce glare.
Plan the Parallel Kitchen Work Triangle
Once you’ve set your two parallel runs, map the work triangle so your sink, cooktop, and fridge sit on a tight, obstruction-free path. Keep each leg short and direct: place the sink between prep and cook zones, and avoid routing traffic through it.
Prioritize Appliance placement by aligning the fridge near the entry, the cooktop opposite your main prep surface, and the dishwasher beside the sink with clear door swing.
Maintain a continuous landing area on both sides of the cooktop and beside the fridge for safe set-downs.
Use Color schemes to reinforce the triangle: brighter finishes at prep and wash stations improve visibility, while darker, durable surfaces near heat hide wear.
Confirm drawers and pullouts don’t collide across the aisle.
Choose the Best Layout: Open or Closed Galley
Once you’ve mapped your parallel kitchen work triangle, you need to choose whether an open galley or a closed galley fits your space and how you live.
An open galley can improve sightlines, connection to adjacent rooms, and the feel of a larger footprint.
A closed galley can control traffic, contain noise and cooking mess, and keep workflow focused between the two runs.
Open Galley Benefits
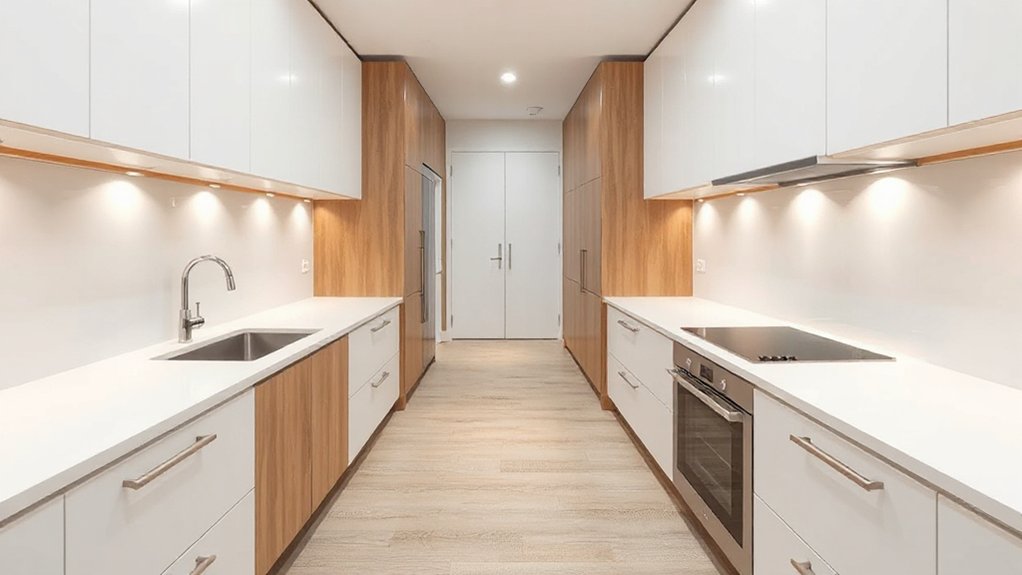
Although a galley kitchen is known for its efficiency, an open galley adds a major advantage: it keeps that streamlined workflow while making the space feel larger and more connected to the rest of your home. You’ll gain sightlines to living and dining zones, so you can cook while talking with guests or watching kids.
Use consistent color schemes on cabinets and walls to visually widen the run and reduce contrast breaks. Plan appliance placement to protect the work triangle: keep the fridge at an entry end, center the sink between prep surfaces, and position the range with landing space on both sides.
Add a peninsula or slim island only if it preserves clear aisles. Finish with layered lighting to eliminate shadows.
Closed Galley Advantages
Closed galleys let you tune color schemes without worrying about matching adjacent rooms. You can go bolder or darker while still feeling cohesive.
Appliance placement becomes easier because you’re designing for a dedicated corridor: align the sink, range, and fridge for short steps, then tuck the dishwasher and microwave where doors won’t block aisles.
Add a pocket door for flexibility.
Parallel Kitchen Storage Ideas That Reduce Clutter
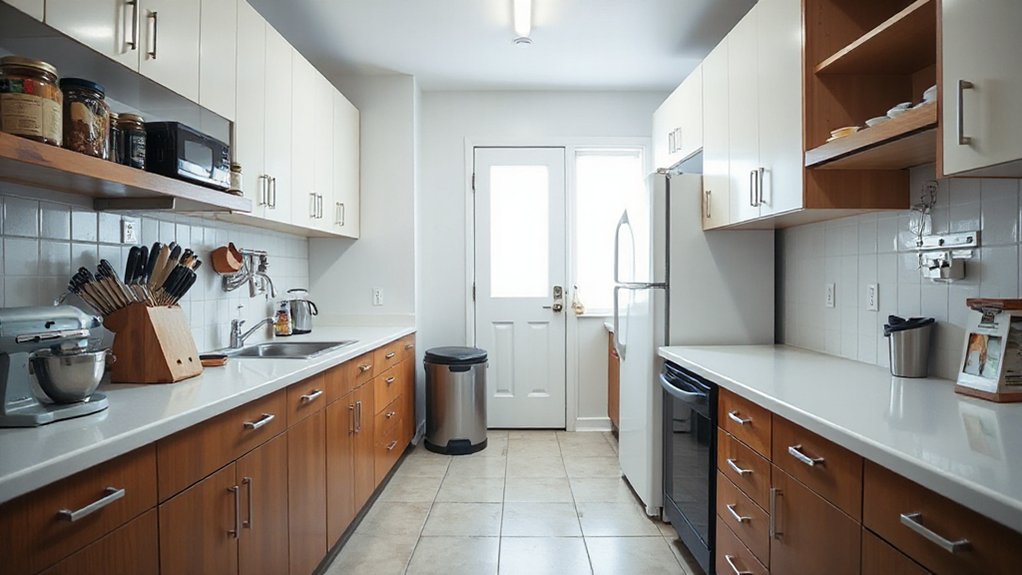
When you’re working with two parallel counters, smart storage choices keep the walkway clear and stop clutter from spreading across both sides. Start by zoning: store prep tools by the sink, cooking tools by the range, and serving items near the exit.
Use full-height uppers on one run and open shelves on the other to balance access and visual calm.
Add pull-out pantries, tray dividers, and deep drawer organizers so everything has a fixed home. Mount a slim rail for utensils, but limit it to daily essentials.
Keep counters empty by assigning small appliances to an appliance garage and planning appliance placement so cords don’t cross the aisle.
Finally, choose color schemes that match cabinet fronts to walls, helping bulky storage visually recede and feel lighter.
Parallel Kitchen Lighting to Brighten Both Runs
Because a parallel kitchen splits work across two runs, you’ll get the best results by layering light instead of relying on a single ceiling fixture. Start with evenly spaced recessed LEDs to eliminate shadows in the aisle, then add under-cabinet strips on both sides so prep zones read clearly.
Use a dimmable, linear pendant centered between runs for comfortable ambient light without glare. Match color temperature (3000–3500K) across fixtures for color coordination, and choose high-CRI lamps so finishes and food look accurate.
Plan switching by task: one circuit per run plus an ambient circuit. For appliance integration, add toe-kick lighting near the fridge and ovens to guide night traffic and highlight built-ins without overpowering the room.
Pick Durable Surfaces for a High-Traffic Galley
Once your lighting plan makes both runs bright and easy to work on, your surfaces need to handle the daily grind in a narrow aisle where bumps, spills, and constant wipe-downs happen fast. Choose quartz or porcelain counters for stain resistance, and specify a tight-radius edge to reduce chipping where hips and bags graze.
For cabinets, pick a durable thermofoil or quality lacquer with a washable sheen, and add metal pulls to protect door fronts. Use a tough, matte tile or LVP floor with high slip resistance and dark grout to hide wear.
Coordinate Color schemes with performance: mid-tones mask scuffs better than pure white.
Align Appliance placement with heat and water by using splashes behind cooktops and waterproof panels near sinks.
Common Parallel Kitchen Mistakes to Avoid
Even with great materials and lighting, a parallel (galley) kitchen can feel cramped and frustrating if you repeat a few common layout missteps. Don’t squeeze the aisle below 42 inches; you’ll create traffic jams and make appliance doors clash.
Plan appliance placement so the fridge, sink, and cooktop form an efficient sequence without forcing you to backtrack. Avoid parking the dishwasher opposite a cabinet bank you need open at the same time.
Keep landing zones beside the oven and sink, not across the aisle. Skip mismatched finishes: poor Color coordination makes two runs look disjointed and visually busy.
Don’t overdo upper cabinets; they can overwhelm sightlines and block task lighting. Finally, align pull-outs and handles so adjacent drawers don’t collide during use.
Parallel Kitchen Design Ideas for Small Spaces
When you’re working with a tight footprint, a parallel kitchen can still feel open and efficient if you treat each run like a purpose-built workstation. Keep the aisle 42–48 inches when possible, and prioritize clear landing zones beside the sink and cooktop.
Use slim, full-height storage on one side and drawers on the other to reduce door swing conflicts. For color schemes, choose light, low-contrast cabinets and a continuous backsplash to visually stretch the walls; add one dark accent only on a lower run.
Plan appliance placement to protect traffic flow: put the fridge at an end, stack oven/microwave to free counter space, and use a 24-inch dishwasher if needed.
Add under-cabinet LEDs and reflective finishes to brighten.
Frequently Asked Questions
Can I Convert a Single-Wall Kitchen Into a Parallel Kitchen Easily?
Yes, you can, if you’ve got enough width for two runs and a clear aisle. You’ll re-route plumbing/electrics, add Storage solutions, and plan Lighting enhancements to keep prep zones bright and clutter-free.
What Appliances Are Best Suited for a Parallel Kitchen Layout?
You’ll want slimline fridge, built-in oven, induction cooktop, vent hood, and dishwasher—plus microwave drawer. Like a calm culinary corridor, prioritize appliance placement and ergonomic design: stack ovens, center sink, keep tall units at ends.
How Much Does a Parallel Kitchen Remodel Typically Cost?
You’ll typically spend $15,000–$50,000+ on a remodel, depending on materials and labor. For accurate cost estimation, get 3 bids, price cabinets, counters, plumbing, and set a contingency during budget planning.
Are Parallel Kitchens Suitable for Wheelchair Accessibility or Aging-In-Place Needs?
Yes, you can make them suitable if you plan clear aisle width, smooth flooring, and reachable storage. Add Accessible countertops, pull-out shelves, and Ergonomic tools. You’ll improve turning space, reduce bending, and support aging-in-place.
Which Design Styles Work Best With a Modern Galley Kitchen?
Like a clean canvas, you’ll get the best results with minimalist, Scandinavian, and contemporary industrial styles in a modern galley. Use Open shelving to keep sightlines light, and add Color accents through tile, hardware.
Conclusion
You’ve mastered the parallel kitchen—two tidy runs, one hardworking aisle, and zero room for chaos (sorry, clutter collectors). Keep 42–48 inches clear, nail the work triangle, and decide if you want an open galley for gossip or a closed one for peace treaties. Use vertical storage, task lighting on both sides, and durable counters that don’t fear busy weeknights. Skip the jumbo island fantasy; measure first, brag later.